
Choosing the proper baseboard for your new space can help tie the theme and style together. There’s an extensive range of baseboard options, including the baseboard shape, material, color, and height. Some of the most striking, modern aesthetics include no baseboard at all.
Baseboards help to transition floor materials to wall materials and hide unsightly lines. Eliminating baseboards from your interior decor requires more installation labor and skill. The contractor will have to be very precise and clean with their installation of floors and walls. This could increase your overall cost of construction.
What follows is an overview of why you should have a baseboard, the options you can choose from, and how to eliminate your baseboards for a modern look.
Why are Baseboards Installed?
Homeowners install baseboards to provide a finished and complete look to their homes. With common or basic materials of construction, baseboards and crown molding help tie everything together. They also hide unsightly flaws in the joining of floors, walls, and ceilings. Without baseboards, most homes look cheap or poorly made.
When your home is new, you may not see any cracks or shaky lines in your corners. You may wonder if baseboards are necessary. Over time, cracks may appear due to settling foundations or expansion and contraction. You usually don’t see these cracks because the baseboards hide them.
Baseboards also prevent the walls from being damaged by moisture. Any spills or leaks that hit the floor can seep into the drywall. Drywall is a very porous material that can be easily ruined by moisture. Even mopping can leave marks and water stains. Painted wood, MDF, or plastic baseboards create a barrier between the drywall and the floor.
The right angle provided by the baseboard against the floor is also easier to clean. Dust and dirt can easily fall into the floor and wall cracks. Baseboards keep that from happening.
How Different Flooring Materials Intersect Walls
Different types of flooring materials intersect your walls differently. Some homeowners install the baseboards below the finished flooring material, while others install them over it. Most commonly, the bottom of the baseboard rests or appears to be resting on the finished floor.
Baseboards can be installed either before or after the carpet. Installers say that whoever gets there first has an easier time installing their finish. Carpet installers can install the carpet all the way to the wall. If the baseboard installer gets there first, the baseboard can be installed close to the subfloor or raised to the thickness of the carpet. When considering the finished height of the baseboard, consider the thickness of the baseboard that might be hidden.
Walls finished with tile typically don’t have baseboards, but when they do, the baseboards can’t be attached with nails. The baseboards must be attached with adhesive. When the finished floor is tile, the baseboard should hide the cut edge of the tile. A tiler cannot put grout between the tile and the baseboards without the grout cracking over time. Ideally, The baseboard is installed after the tile so that the grout between tiles can be added correctly.
Expansion and Contraction in Homes
Materials in your home expand and contract through the seasons. Heat causes many materials to expand. Humidity often accompanies high temperatures, which can also cause materials to expand. However, cooler temps and drier weather can cause materials to shrink.
This expansion and contraction can lead to cracks and finishes over time. If you’ve ever noticed hairline cracks in the corners of your building or around windows or door frames, the likely cause. Natural settling of your home’s foundation can also lead to minor shifting.
Baseboards can help cover up some cracks at the floor level where it meets the wall. You must be very careful about how you detail the no-baseboard look.
When Did Baseboards Start?
Modern-style baseboards can be traced back to some types of ancient Greek construction. But, baseboards as we know them started to become popular during the Victorian Era. With the rise of the middle class, more homeowners wanted their homes to look more ornate and expensive. Previously, baseboards and other trim pieces were only found in expensive homes.
Historically, baseboards could be made from hand-carved wood or molded by hand from plaster. Creating these pieces was costly and took a long time to complete. Therefore, most homeowners would not have been able to afford to add these elements to their design.
By the time of the Industrial Revolution and especially after the World Wars, builders needed an easier way to build homes quickly without compromising a finished and well-decorated home. Baseboards and other trim were detailed with intricate patterns to bring flourish to otherwise plain plaster and hardwood flooring.
Modern construction technology has made baseboards much more affordable and accessible for homes of all styles.
Different Types of Baseboards
A far cry from the ornate trim pieces of the Victorian Era, options for modern baseboards suit a plethora of home styles and needs. When choosing a type of baseboard, decide what style your home will be.
Older homes in historic neighborhoods may lean towards traditional baseboard patterns and installations. Homeowners of contemporary, suburban homes could consider either traditional or modern styles. Homes in the midcentury or modern styles should venture into clean, simple baseboard styles or go with a no-baseboard look.
Different Profiles of Baseboards
Multiple options are available for the shape, size, and height of your baseboards. You may achieve your desired style with a single piece of baseboard. Some looks must be built up with multiple pieces.
The base piece can be used alone or in combination with shoe molding and a base cap. The shoe molding is a small piece that goes in front of the base, covering where the base meets the floor. The base cap sits on top of the base piece, covering where the base piece meets the wall.
Flat baseboards have no decoration, bevel, or designs. The edges are square. This profile can sit on top of the wall or be recessed for a no-baseboard look. You may choose to leave the baseboard in a contrasting color, such as stained wood, or striking white or black. The baseboards can be painted the same color as the walls for the no-baseboard look.
Clamshell baseboards include a rounded bevel on the top edge of the baseboard. This style is a simple single piece that is easy to install, clean, and match for future repairs or renovations.
Ornate baseboards may have any number of miter cuts and bevels to create a unique and complicated profile. They may be purchased from a selection of pre-cut styles, or a carpenter can create a custom profile for you. This style is typically used in more historic or classic-style homes. Homeowners may have difficulties finding exact matches for store-bought baseboards years after installation. However, most profiles can be recreated with woodworking tools.
Baseboard Materials
Baseboards are typically made from wood. Pine and oak are common, but other lumber types can also be used.
Modern baseboard material options include vinyl, urethane, PVC, and MDF.
MDF is a type of composite material made from wood and adhesives. MDF baseboards cost less than traditional wood. However, they are less durable and prone to swelling when exposed to moisture. Primer and paint can protect the composite material from normal wear and tear.
Vinyl baseboards are flexible, water-resistant, and helpful for high-moisture areas like bathrooms and kitchens. They create a seam between the walls and floors. It’s ideal for high-traffic areas, including spaces that are mopped frequently. Most often, vinyl baseboards are used in commercial spaces, less often in residential homes. It’s best to use a hairdryer to bend the vinyl around corners for a seamless look.
PVC and urethane baseboards are also helpful for water-prone areas, such as garages and outdoor spaces. They can come in shapes similar to traditional styles. VintageWoodWorks.com points out that they expand and contract less than wood, making them less prone to cracking. These types of plastic baseboards can be screwed into place using plastic caps to hide the screws before priming and painting.
Picking the Right Baseboard Height
Be sure to pick a baseboard height that is proportional to your room. Except when going for a no-baseboard look in a modern home, baseboards that are too short or tall look awkward in your space.
Baseboards for 8’ high ceilings should be between 3-5” tall, while ceilings as tall as 10’ need 5-7” tall baseboards. Other rules of thumb say to compare your baseboard height to your casing trim and crown molding. Baseboards should be taller than the trim of your doors and windows. But it should be proportional to the crown molding if you have any.
With baseboards as tall as 5-7”, you may consider a flat baseboard or use a flat baseboard with a shallower flat base cap. Taller baseboards use more materials and are typically more expensive. The details should be proportional to the overall size. Small miters used in shorter baseboards are less noticeable in taller heights.
Creative Baseboard Ideas
Consider some creative options if neither traditional nor modern baseboard styles appeal to you.
- Use unfinished lumber, hand-planed planks, or even logs for a rustic look.
- Metal channels, angle iron, or pipes fit in an industrial style.
- Ceramic, porcelain, or mosaic tiles work if not grouted into the floor and wall.
- Leftover building materials, such as hardwood planking from your floors
- Stones, either rough-hewn, river rock, or polished
- Building blocks, bricks, or other children’s toys for a nursery or playroom
You do not have to purchase baseboards marketed and sold as baseboard materials. Feel free to think outside the box if they fit your home style and work for your needs!
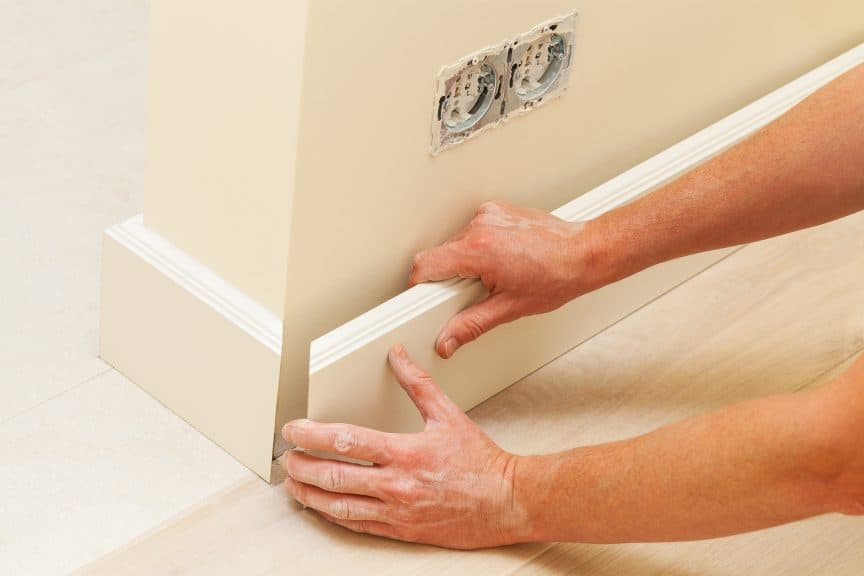
How To Install Baseboards
Installing baseboards can be straightforward. But, when walls have bumps and depressions, the baseboards may accentuate the imperfections. Floors that aren’t level can make it hard to align your straight baseboards around the room. Here are a few tricks to help you get clean, professional lines as you install your baseboards.
Most baseboards are tacked into place by nailing through the baseboards into the wall studs. Small brad nails should be used as the head is minimal. Wood filler or paint can easily cover up the hole left behind by the nail.
Sometimes baseboards are attached with adhesive. However, adhesive makes removing the baseboards in the future for renovations or repairs more complicated and can damage the drywall.
Leveling Baseboards with Uneven Floors
When the floor is uneven, the baseboard lifts when it touches high points, becoming uneven. To level the baseboard with the floor, use a technique called scribing. Scribing transfers any undulations of the floor onto the baseboard.
To scribe your baseboard, temporarily tack it into the place or have a friend hold it level. Check the level with a four-foot level. Then, use a compass to trace the unevenness of the floor. The pencil will trace a line on the floor as you run the other side of the compass along the floor.
After tracing the line, cut the baseboard with a circular saw, following the waves and curves. Once you’ve trimmed your board, you can fit it into place such that the top edge of the baseboard is level. Set a small gap between the baseboard and your finished floor. If you install the baseboard before installing your finishes, leave enough depth to fit the flooring under the baseboard.
Close Wall Gaps with Adhesive
Unfortunately, since baseboards are taller than they are thick, it’s harder to cut along the length of the baseboard using the scribing method to accommodate bumps in the wall. However, most baseboards are flexible enough to bend.
To close gaps due to wall bumps, use adhesive to glue down the gap. Add adhesive to the backside after tacking the baseboard into place at the studs. Then, use shims or blocks as wedges at the bottom edge of the baseboard to force the baseboard in contact with the wall. Let the adhesive completely dry before removing the shims.
Thicker baseboards require a little more work. Minimize gaps by sanding down the back of your baseboard. This takes a little guesswork. You can also sand down the drywall, especially if a build-up of mudding and tape causes the bumps. However, if the gap remains, fill the gap with caulking. Make sure the caulk you purchase is paintable, which will help minimize the appearance of the gap.
Repairing Worn or Damaged Baseboards
Since the primary reason to install baseboards is to act as a buffer or protection for your walls, they often get scuffed, dinged, or damaged through normal wear and tear. However, repairing or replacing worn baseboards is more manageable than frequently cutting, patching, and frequently painting damaged drywall.
Hiding baseboard damage is manageable. Dings and scuffs in painted wood baseboards can be quickly filled with wood filler and repainted. Stained wood finishes can be slightly harder to repair. With some finesse, the same wood filler, stain, and fresh varnish can make most damage unnoticeable to guests.
If the damage is more profound than can be fixed with wood filler or you have an alternative baseboard, you may be able to replace small sections of baseboards.
Replacing Sections of Baseboard
Baseboards are commonly installed in sections. A length of a wall may have one section of baseboard or multiple. If you want to replace a small section of the damaged baseboard, start by investigating how the baseboard was installed.
HomeGuides says that you should be able to cut a small section using an oscillating saw, reciprocating saw, or even by hand. Avoid cutting the drywall behind your baseboard, at least where you’d see it above the baseboard. If the baseboard is nailed to the studs, you can use a pry bar to pull the section of the baseboard away from the wall.
If the baseboard is glued into place or gaps are filled with caulking, you may need additional tools. Use a box cutter, razor blade, or chisel to score the adhesive, slowly separating it from the wall. Apply gentle pressure with the prybar as you work. Use a heat gun to soften the adhesive. However, be careful not to damage your floor finish in the process.
PVC baseboards can be sanded and filled similarly to wood for more minor scratches. Vinyl, PVC, or Urethane baseboards should be replaced in sections for larger dents and scratches. Find seams where the baseboard pieces were glued into place. Since these baseboards are typically glued into place, you may need to use a blade or heat gun to remove the pieces.
How to Eliminate Baseboards
You have several options for a no-baseboard look, including no base, a reveal, and a flush mount. Another option for modern styles is the applied baseboard style.
True No Baseboard Look
To achieve a no-baseboard look authentically, the wall finish meets the floor with nothing in between. Homeowners say that the no-base look is easier to clean and maintain. However, others say that the bottom edge of the walls is more easily damaged by vacuuming or mopping.
The contractor must hold the drywall back from touching the finished flooring to ensure that cracking doesn’t occur during expansion and contraction. This can be a difficult job for the drywaller.
Baseboard Reveal Base
A standard architectural detail called a reveal holds back the edge of one surface from another, forming a gap. This reveal may be almost unnoticeable for a no-baseboard look, such as in the authentic no-baseboard look. When the gap is more noticeable, the reveal casts a dark shadow.
Small reveals are only fractions of an inch tall. More significant reveals may be several inches tall, following similar proportional rules to choosing a baseboard height. Large reveals may contain light coves, hidden air conditioning vents, or whole-house vacuum cleaners.
For a modern, clean look, consider installing LED tape on the underside of the reveal for night lighting. Alternatively, consider painting the reveal black to hide imperfections in the installation.
Flush Baseboards
A flush base mimics a no-baseboard look by installing a flat baseboard flush with the drywall. This technique requires the drywall to be held back from the floor to the depth of the desired baseboard. The edge between the drywall and baseboard can be plastered over, eliminating lines. Optionally, the edge can be celebrated with a slight gap.
The flush base can be painted to match the wall, hiding the baseboard, or painted another color to provide a contrast. However, if painted another color, the edge of the drywall should be lined with a bead to finish the raw edge of the drywall without plaster carrying over to the baseboard.
For walls with finish materials other than drywall, consider making the baseboard the same material as the wall. Options include a deeper tile or wood paneling.
Modern Applied Baseboard Style
Applied baseboards are another name for traditional baseboard installations. The baseboard is installed or applied on top of the drywall. Try a tall, simple baseboard profile with the applied baseboard method to achieve a modern look.
Using a shallow depth minimizes the appearance of the baseboard, especially when the baseboard is proportionally taller than in traditional styles. Consider tapering the top edge or using a very slight bevel to minimize the shadow further, blending the baseboard with the wall.
Bead Gap
The contractor should also use a bead between the floor and the wall to achieve the no-baseboard look. A bead is a place of plastic trim that the drywaller can use to create a gap while finishing the bottom edge of the drywall.
There are several different styles of beads. Corner beads are typically installed on the corners to help protect them from damage and to help the installer create a straight corner.
L beads are shaped like an L, where one leg of the L is designed to be plastered over, and the other leg is smooth. This bead is commonly used to create the reveal or gap necessary for no baseboard looks.
J beads are also used to slip over the bottom edge of the drywall. This type of bead reinforces the edge of the drywall.
Beads are typically installed by applying an adhesive to the plastic and aligning it on the drywall. A level helps to make sure the bead is placed evenly. Once the bead is stuck into place, it can be plastered over for a clean, modern look.
Can You Save Money Not Buying Baseboards?
Owners may be under the impression that if they do not buy baseboards, they may be able to save money on their construction cops. However, without baseboards, the contractors must pay careful attention to how they install the finished flooring and the drywall.
Baseboards typically cover up any imperfections. Therefore, you need a qualified, experienced contractor to do clean and precise work. Expect to have additional labor costs for this type of installation.
If you install flat baseboards over the top of your drywall to hide uneven or jagged wall edges, the baseboard material costs around $1.25 per linear foot. This cost does not include labor, nails, finishes, or other materials to install the baseboards.
A reveal bead may add about $0.20-0.30 per linear foot, not including additional adhesive or plaster to finish the bead. Installing a flat baseboard with a reveal bead costs about $1.25-1.55 per linear foot, though the additional labor would cost more.
With an authentic no-baseboard look, the bead cost is just a fraction of the baseboard cost. However, the increased time to add the bead to the drywall can increase labor costs. On average, the total cost of smaller projects is typically more per linear foot than more significant projects.
According to Honeywyse.com, in the Bay Area, the total cost of materials and labor for a traditional baseboard project is between $6.52 and $10.22 for 200 linear feet.
Should You Install Baseboards In Your Home?
Baseboards create a finished and clean appearance for your home. Choose a style that works for your home. You can choose the no-baseboard look if your style includes modern and minimalistic aesthetics. Keep in mind that eliminating baseboards is labor-intensive and more costly. You can use your choice of baseboard style to express creativity in design!
Share this Post
Giovanni Valle is a licensed architect and LEED-accredited professional and is certified by the National Council of Architectural Registration Boards (NCARB). He is the author and managing editor of various digital publications, including BuilderSpace, Your Own Architect, and Interiors Place.