
Affiliate Disclaimer: Some of the links below are affiliate links. As an Amazon Associate, I earn from qualifying purchases.
Covering nail holes in a wall is something you’re likely to encounter if you’re a homeowner or renter. Perhaps you’re redecorating your space or are getting ready to move; the photos, artwork, shelves, and signs that once hung on your walls are now gone. All that remains are the trusty nail holes in your walls. While repairing the hole may sound daunting, there is a relatively simple fix.
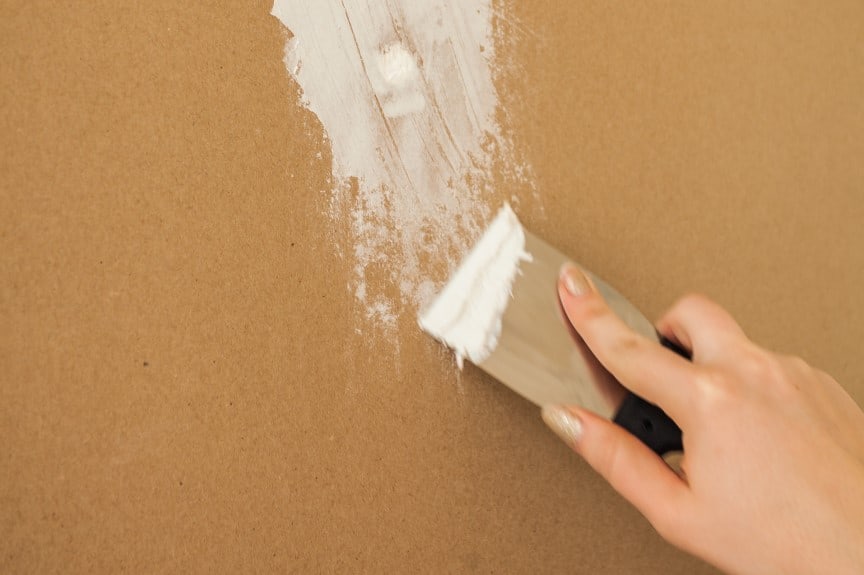
To easily cover nail holes in a wall, you’ll first take a drywall joint compound (such as spackle) and apply it to the spot. Next, take a piece of fine-grit sandpaper and smooth out the surface. Then, you’re ready to use a small coat of paint to finish the repair.
Throughout this article, you’ll also learn about techniques for larger holes, non-traditional methods, and filling holes in finished wood. We’ll also cover best practices in regards to wall repairs when selling your home.
Do I Need To Patch Nail Holes When Moving?
If you’re getting ready to sell your house, you’ve probably asked the question of whether or not you need to patch all the nail holes. Considering the time required to fill each hole, is it worth all the trouble? When selling your home, it may help your top dollar, in the long run, to fix those holes before the house sells. Realtor.com lists patching holes in the walls as number one on their list of essential things to do before moving out.
Forbes.com advises, “Make sure your house is ready for its close-up.” Your home is about to be photographed and shared on multiple listing sites, as well as inspected from top to bottom by potential buyers and real estate professionals. As they walk through your house, everything must be in the best possible shape. Consider the buyer’s perspective and pinpoint any potential deterrents to their home-buying experience.
Seeing holes in the walls may be a potential red flag for buyers as they’re contemplating the purchase. It may drive down the negotiation as they see it as additional work for them once they move in. If you’re looking to get the best deal possible on the sale, consider following the home selling etiquette of repairing the nail holes before you leave.
How To Easily Cover Nail Holes in a Wall
Here are five easy steps to covering nail holes in a wall.
Gather Joint Compound, a Putty Knife, & Sandpaper
Arguably, the most critical step is to make sure you have the necessary supplies for your DIY project. You’ll need the following materials to cover nail holes in a wall:
- Drywall joint compound
- Putty knife
- Fine-grit sandpaper
- Paper towel or rag
- Small paintbrush
- Paint
Drywall Joint Compounds
You’ll need to purchase a drywall joint compound to start the process. I recommend buying this 3M High Strength Small Hole Repair. This spackling compound provides a quick and easy fix for small holes, doesn’t shrink, crack, or sag, and is recommended for use up to 3” in diameter. The compound you choose is significant, as it’s the main component for this project’s success.
A Small Putty Knife
You’ll use a small putty knife to apply the compound. Be sure to purchase one that has a smooth edge and comfortable grip. I recommend the Red Devil 4206 2” Flex Putty Knife. Two inches will provide enough coverage to fill the hole, and you can use the tool for future home projects.
Fine-Grit Sandpaper (or a Sanding Sponge)
Fine-grit sandpaper is required to smooth out the surface once the compound dries. Sandpaper is normally categorized by its grit size. For this project, you’ll need a grit size between 180 to 320 for the finishing touches. You can either purchase these Fandeli Assorted Grits or use the 3M SandBlaster Sponge. While both products will get the job done, a sanding sponge will allow for a consistent, even pressure on the surface.
A Rag, Paint & a Small Paintbrush
Most drywall compounds will be white or gray once they’re re-dried and sanded. More than likely, you’ll need to apply paint to the area to match the current color and help the repair to blend in. Be sure to have a paper towel or rag, a small paintbrush, and the desired paint color for the final steps. Ultimately, the goal is to make the repair undetectable after the project’s completion.
Fill the Hole With Drywall Joint Compound
Take your putty knife and apply a penny-sized amount of spackle to one corner of the knife. Gently press the spackle directly onto the hole, being sure to fill it. Scraping the putty knife across the spot will successfully apply an even layer flush with the wall. Wash the putty knife, and use it again to scrape any excess spackle off the wall. Let the spackle dry according to the manufacturer’s instructions, typically 15 to 30 minutes, before proceeding.
Sand the Area Lightly To Smooth the Surface
Using your fine-grit sandpaper (either a sheet or sponge), gently sand the hole’s surface to create a smooth and even surface. Remember to lightly sand so that you don’t accidentally remove too much of the spackle, and keep consistent, even pressure on the area. If you find that your hole is still indented, you may need to repeat the previous step to add another layer to make the hole flush with the wall.
Remove Dust With a Dry Towel or Rag
As you prepare to paint the area, you’ll need a clean surface. Take your paper towel or rag and wipe the surface to remove any of the dust from sanding. Be sure to use a dry towel or rag. If you use anything that’s slightly damp or wet, it can damage the repair job. This step is required, as it also helps the paint adhere to the wall better. Take this time to ensure the surface’s readiness before adding any color to the surface.
Paint the Repair & Let It Dry for 15-30 Minutes
Lastly, take your small paintbrush and your chosen paint color and apply an even coat over the repaired area. Allow this to dry for 15 to 30 minutes before evaluating if a second coat is necessary. If you’re painting with a lighter color, you may need to apply a second coat of paint to blend the area better. After the paint has thoroughly dried, the previous hole should no longer be detectable.
Congratulations! You’ve successfully repaired a nail hole in the wall.
Techniques for Covering Larger Holes
If you have larger holes in your drywall, you may need to apply some drywall joint tape to the area before adding in the spackle. Drywall joint tape is typically made of mesh fiberglass and joins two pieces of drywall. In this context, the joint tape bridges the larger gap and provides support for the joint compound.
I recommend using the Duck Brand 282083 Self-Adhesive Fiberglass Drywall Joint Tape. Not only will this tape allow for quick results, but it also turns a daunting task into a simple fix. The self-adhesive tape will enable you to swiftly apply it to the affected area and continue with the repair. It’ll come in a roll for easy storage and allow for use in future projects.
When fixing a larger hole using the joint tape, you’ll add the following step to the beginning: cover the hole with joint tape before adding the spackle. You may need to add additional layers of spackle in between sanding, but the process remains the same.
Non-Traditional Methods
There are other ways of filling the hole instead of using spackle. While spackle has better durability, the following methods would help if you’re in a bind and need a quick repair:
- Use a bar of soap and rub it over the hole until enough soap is built up and is flush with the wall.
- Create your compound using a mixture of baking soda and white glue to make a moldable mixture and apply that to the hole.
- Use white toothpaste for smaller gaps and allow it to dry before painting.
Filling Holes in Finished Wood
Filling holes in finished wood is very similar to filling gaps in drywall or plaster. Instead of using a drywall compound, you’ll use a wood filler. Be sure to purchase a wood filler that closely matches the color of your wood to make the process easier. Wood filler has the consistency of putty, so your approach will be slightly different. Utilize the following steps to fill holes in finished wood:
- Apply wood filler to the putty knife and gently fill the gap.
- Take a clean, dry rag and smooth out the wood filler to become flush with the rest of the wood.
- Allow the putty to dry before painting or applying any finish to the area.
The finished product should be smooth and virtually undetectable to anyone who views it.
Conclusion
Repairing small nail holes in walls is a manageable and approachable task for homeowners to complete without a professional’s aid. Especially if you’re selling your house, consider following the above steps to repair the wall successfully. Gather your supplies, apply spackle to the area, sand it down, wipe it with a clean cloth, and apply the finishing coat of paint. A little bit of elbow grease now can go a long way for the future of your home.
Sources
- The Free Dictionary: Flush with (something)
- Realtor: 7 Important Home Repairs to Do Right After Moving Out
- Moving: How to Fix and Cover Nail Holes
- WikiHow: How to Fill Nail Holes
- Homedepot: How to Patch Drywall
- Lowes: Sandpaper Buying Guide
- Forbes: 5 Home-Selling Etiquette Rules Every Seller Should Know
- The Spruce: How to Finish Drywall
- Wikipedia: Sandpaper
Share this Post
Giovanni Valle is a licensed architect and LEED-accredited professional and is certified by the National Council of Architectural Registration Boards (NCARB). He is the author and managing editor of various digital publications, including BuilderSpace, Your Own Architect, and Interiors Place.