
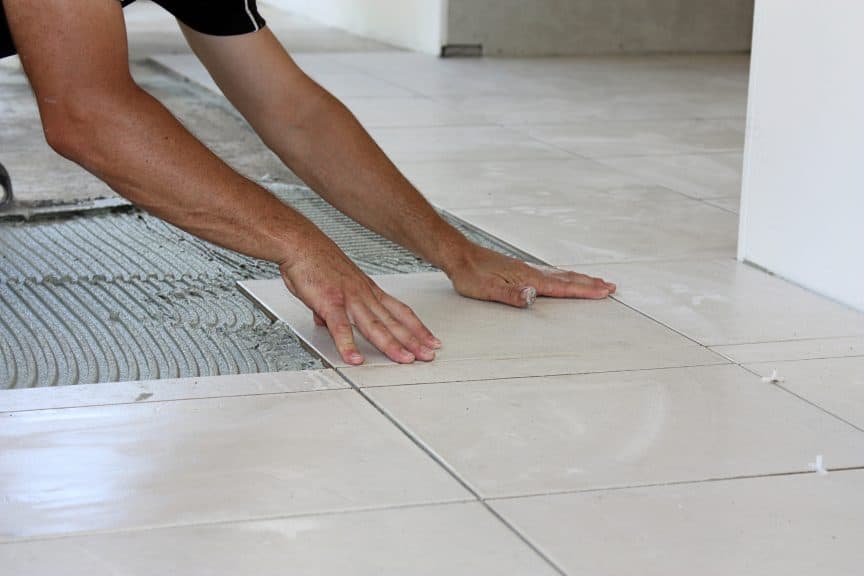
It can be tempting to want to install a new tile floor without removing baseboards since doing so can be more labor-intensive. However, if the baseboards are not removed, the new floor tile may not fit correctly under the baseboards. But does tile actually need to be installed underneath in the first place?
Tile should be installed underneath baseboards. While it is possible to lay tile while keeping baseboards in place, experts mostly advise against it, since proper alignment can be difficult to achieve, resulting in a sloppy-looking floor-to-wall joint. This removes the attractive advantages offered by baseboards in the first place.
Learning how to renovate your own home is an exciting and empowering feeling. But some challenges come with it. In this article, I’ll be addressing common questions in the home improvement process, including the most effective ways to remove and reinstall your baseboards.
Can You Lay Tile Without Removing Baseboards?
You can lay tile without removing baseboards, but this will create a less attractive product. Baseboards are designed as a finishing product to give your home a clean, polished look and hide gaps between the walls and floor. In adding baseboards first, you’re diminishing their purpose.
Baseboards Enhance the Aesthetics of Your Home
Baseboards are long strips of protective material, usually wood or vinyl. They run along the bottom of every wall at the crease where it meets the floor. You can use baseboards to create an attractive finishing surface or a protective barrier for your home.
As an aesthetic feature, baseboards are a great way to contrast the wall colors and bring a room to life. They typically have a clean, bright color, which visually opens up space and creates a finished look. They also include decorative beveling to tie a room together and add a creative spin to any room.
While baseboards may not be something you notice when you step into a house, you definitely can tell when someone has gone without them.
In addition to being a great way to tie together a room visually, baseboards offer your walls protection from the daily wear and tear of life. Along the floor, your walls are susceptible to damage from vacuum cleaners, spills, and mild kicks. Baseboards serve to seal off your border from water damage and other simple abuse.
Poorly Installed Baseboards Don’t Look Good
Just as you can tell when someone has gone without baseboards, it is glaringly apparent when someone has improperly installed them over tile or other hard floorings.
Because baseboards exist to finish a room attractively, they should be the absolute last step taken. Otherwise, it is nearly impossible to glue and grout tile completely flush with both the wall and baseboards. Even with a meticulous, professional level of measurement, nearly guaranteed space or cracks are left behind.
By skipping the critical step of removing your baseboards, you are costing yourself long-term peace of mind and creating issues that you’ll inevitably have to deal with later.
Why You Should Remove Baseboards Without Damage
In the end, removing your baseboards is the best way to effectively ensure that your flooring is flush with the wall and attractively sealed away. While it may cost you a bit more time at the moment, it is well worth the effort in the long run.
Gather Hammer, Glue, Pliers, Blades, and Nails
Before beginning the process of removing your baseboards, it’s wise to check and be sure you have all the necessary tools. There is little more annoying than being in the middle of a project and having to stop for a run to the hardware store.
Common tools:
- Utility blade
- Thin Scraper Blade
- Pliers
- Thin Nails
- Hammer
- Wood Glue
How To Remove Baseboards
When removing baseboards, you must work slowly and carefully. Being overambitious and attempting to rush through the process can damage your drywall, creating holes that will cost you both time and money to repair.
Follow the steps below for removing baseboards:
- Begin the process by sliding a sharp utility knife between the wall and baseboards. This action will cut away any residual paint that may be sealing your baseboards to the wall, allowing you to have fewer painting details to fix later potentially!
- Using a thin scraper blade, create the initial space between the baseboard and wall. Slide the light bar behind the baseboard and gently begin wiggling it to make space. Continue wiggling the bar until you’ve fully separated the baseboard from the wall. Remember that there is no rush; you want to be careful not to damage your walls in this step.
- All that’s left is to clean the surface left behind. Use the scraper to remove any broken baseboard pieces, then pull away any residual nails with your pliers.
For a visual of how to remove baseboards, watch this video:
How To Reinstall Baseboards
Once you’ve appropriately laid down your new flooring, it’s time to reinstall your baseboards.
According to the experts at Home Depot, this process may take more than a day, depending on the amount of space you need to cover. While the process itself isn’t complicated, several of the steps may be time-consuming.
Step 1: Prepare Your Baseboards
The first step is to prepare your new baseboards. This step may require the most time, but it also can be the most fun!
This is the time to imagine what your finished room will look like. Measure out the baseboards, select the level of beveling you’d like them to have, and paint them your chosen color. Be sure that the paint has thoroughly dried before you install your baseboards! Otherwise, you may have another touch-up project to complete.
At this stage, you should also remember to angle the edges of the baseboards to fit snugly into corners and wall ends.
Step 2: Install Your Baseboards
Once your baseboards are sanded, painted, and level, it’s time to install them.
While different home improvement experts recommend various methods to install baseboards, most use a combination of wood glue and thin nails to secure the baseboards to the wall.
Begin by lining the baseboard where you want it. Ideally, it will fit tight against both the wall and floor of your home. Find the studs in the wall itself; that is where you will be placing your nails. From here, it is up to your discretion how many nails you’ll choose to use versus wood glue. Nails create a more secure hold but may take from the overall aesthetic appeal.
When you finish, check for spaces and cracks left behind. These issues are prevalent in older homes, where walls may no longer be perfectly square. If you notice any glaringly apparent issues, you can fix these with either caulk or wood putty. Any space more significant than a quarter of an inch may require further action to repair the problem at hand.
When in doubt, never be afraid to ask workers at your trusted hardware supply store their opinion. In-home improvement projects, there is rarely one “right” way to get the job done!
Conclusion
There’s more than one way to get the job done, and it always serves to listen to those with more experience. That being said, all the experts agree: tiles should be installed underneath baseboards.
Home improvement projects and renovations may seem intimidating at first, but everyone starts somewhere! By learning to take control of your home, you’re teaching yourself lasting, valuable skills.
Sources
- BBB: BBB Impact Report: 2021 Home Improvement Industry Trends
- Architecture Lab: What are Baseboards and Architectural Skirting and How are they Used Today
- Home Depot: How to Install Baseboards
Share this Post
Giovanni Valle is a licensed architect and LEED-accredited professional and is certified by the National Council of Architectural Registration Boards (NCARB). He is the author and managing editor of various digital publications, including BuilderSpace, Your Own Architect, and Interiors Place.