
If you are a homeowner, you may be wondering how to upgrade your home’s value, or maybe you’re concerned about keeping up to date with the latest trends. Crown and cove molding are both common additions that will update your home’s look. It can be hard to know what to choose when you first start out, but either one will give your home a classic twist that it otherwise would not have.
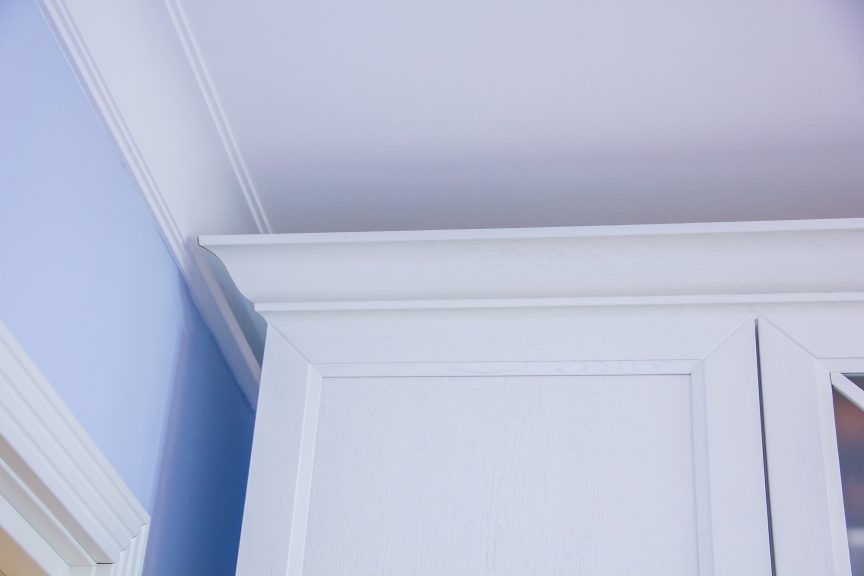
There is only a slight difference in the types of molding you choose, but both can add value to your home. It will be up to you to determine what style each room should be and if you want each room to have the same trim. Crown and cove molding are both trims but shaped differently for special appearances. Both connect the walls and the ceiling together. Crown molding protrudes outward in a flattering way, and a cove molding rounds inward to the wall.
Both crown and cove molding can make a room appear bigger depending on the width and color of the style you choose. If you add certain types of trim, it will add value to your home, and this can be crucial if you plan on selling your home soon. You may also want to consider having a professional do the trim, so it looks better; however, you can do it yourself for little cost. There are a few tricks to try if you’re trying it on your own.
The Difference Between Crown and Cove Molding
Both crown and cove can help a room look put together and make the theme cohesive throughout the whole place. It will help attach the walls and corners together. Trim has been used for thousands of years to signify wealth because it meant a family could afford to finish a room. It is a decorative piece that should not go unnoticed. Both crown and cove molding are a way to signify a room is done.
The main difference is their shape and how they make a room look. Beamed ceilings with cove moldings create lovely optical illusions that allow an architect to be creative. Crown molding can create the illusion of a larger ceiling and a bigger space in the right way. Both options can create open spaces, make walls look more prominent, and give someone control over how well a room looks. Both work well for designing purposes.
When to Use Crown Molding
Not all rooms will work with the wide trim look, and sometimes it will be better for going with a cove molding design. However, if you have high ceilings and a large space, crown moldings can really take your home to the next level. It adds a luxurious look to the ceiling and creates an appearance of wealth and luxury.
If the room is brightly furnished or has large objects, crown coving could add to the room’s appearance. This is a way to add design and flair to a room, while also making it look wider than it really is.
When to Use Cove Molding
If you are looking for modern and simple design, cove molding is one of the best to choose from. Instead of luxurious and rich, it feels modern and sleek. It will no way make your room appear smaller, but it will make it appear bigger. This can be bought for narrow widths. It can be used on top and bottom corners and not strictly ceilings. You can choose whatever looks best for the rooms and whatever design you aim to go for. It can also be a fantastic way to add value to your home.
Different Types of Crown Molding for Your House
There are so many different types of crown moldings that can really add a layer of luxury to your home. Each design is a little different, and you can choose one that you like. Here are the best options to choose from.
Plaster
This is one of the most luxurious; it can have the most intricate designs and make your walls look like it has a lacey design. The downfall of this type of molding is that it is very heavy and can fall off easily. You will need to make sure your walls can withhold the heaviness of this plaster.
Wood
The full wood moldings appear to go upward and flatter. It gives it a regal look that you may find in a cigar bar. It adds a nice flare to the room and gives it an elegant appeal. It is a very classy style that provides a room with a very homey feel. However, if you have extreme weather in your town, this may be a bad option. Depending on the weather, the wood trim can shrink and swell.
Polyurethane
This is an amazing material and trim because it can go into almost any home and work well. It is a very soft material that is easy to work with and good for painting. Due to the soft material, it dents very easily, so it should not be used for anything other than paint.
Flex
A great trim to add around the curved piece or rounded windows. It rounds easily, making it one of the coolest pieces to add in your home. The difficulty with this material is that it must be specially ordered and made for your room. A soft and rubbery material is easy to work with.
Polystyrene
This is by far the easiest material to work with and one of the most budget-friendly. It can be cut easily with scissors or a knife and fit nicely onto most walls. If you’re going to attempt to go the DIY route, this might be the best option for you.
How to Find the Correct Size Crown Molding
There will be different sized moldings to choose from, this may seem intimidating, but it should not be. Something simple and well-fitting will make the place seem much more luxurious than that of something oversized. Picking the wrong sized can lead to a whacky-looking room and decrease the value of your home.
8-foot ceilings
For this size of the wall, you can choose anything from 2-½” tall and 6” tall depending on what you find to be most appealing. Whatever you do, go for something simple that expands the room rather than makes it look smaller. With this length, you will not be able to add many designs to the trim, so it is best to just go for the sleek and simple look.
9-foot ceiling
Due to the larger size, it can hold a bigger and wider crown than an 8-foot wall. You can choose anything between 3” and 7-½” of a trim. You can build them upwards and make them look as intricate and layered, as you want.
10-foot ceilings
To make any form of impact, you can see you will need a larger crown than any others will. Anything like the living room, dining room, or sitting area should have something that is at least 9” this will allow you to do intricate designs and really show off space. If it is less formal and more like a bedroom, you can do something smaller that is less of a visual impact like 4”.
There are so many different sized walls and ceilings, it truly is up to you or the designer of the house. Trim is an exceptional thing because it can truly pull a whole room together. Different widths and heights of trim allow an architect to play around with the look of a room. You can paint different styles of molding to make them blend in or stand out.
How Much Is Crown Molding?
So many things can affect the cost of adding in crown molding to your home. Certain materials will be more expensive than others will, and on top of that, you will need to figure out if it is something you can do yourself. If you pay a professional to come out and add it to your ceilings, it will cost much more than doing it alone. However, if you do it on your own, it may not look good and lower your home’s value.
Usually, adding crown molding will cost anywhere between $200-$600 depending on what you need to do? If you plan on adding in a very elaborate trim around the whole house, it could be much more than $600. If you plan to add effortless trim to one room, it could be less than $200. It all depends on what you want in a design that will affect the overall price.
Can You Add Crown Molding Yourself?
You can make almost all home improvements without a professional. However, that does not mean they will turn out good. There is no easy way to do this kind of home repair, and you will need to do a lot of research before starting, but it is possible. You will need to figure out some ideas of what you like and compare them to the skills that are required and what you have. If you do not think you can do it, or have proper tools, it may be best to save it for the professionals.
What You’ll Need
If you do decide to go the DIY route for crown molding, make sure you have the proper tools first. Or, check into borrowing them from someone before you commit to doing it yourself. Some of these tools come with a hefty price tag, so if you’re doing the crown molding on your own to save money, borrowing tools is the best way to go, too.
Keep in mind, you’ll want to have all of the tools lined up and ready to go before starting the job. There’s not exactly a good stopping point for putting the project on hold while you wait for a particular tool. Before you get started, make sure you have all of these things ready for action:
- Sturdy tape measure
- Medium sized level
- Wood rasp
- Accurate stud finder (the old knocking on the wall trick won’t work here)
- Compound miter saw
- Sandpaper (40 grit and 220 grit)
- Finish nailer
Using Cove Molding a.k.a. Trim
Molding and trim are often used interchangeably, and they are just two words for the same thing. There is no difference. When we are talking about crown and cove moldings, it refers to the type of trim used to add a design element to the room and house. Many of the trim available types can add value to your home and add some pizzazz to it that normally wouldn’t be there.
Choosing the Cove Molding of Your House Can Add Value
So many things you choose to do with your home can affect the value of it. To make any changes, you will want to be sure you own the home or have permission from the homeowners to renovate certain things. When things look nicer on the inside, they tend to sell faster. The sleeker and newer your trim looks will help a room seem enhanced when it is empty for showing. This can make it sell much faster than a house that doesn’t look put together would.
It is unnecessary to have a crown or cove molding to help sell a house, but it is a huge help. When you choose a crown molding, you should also choose a trim at the bottom of the wall that matches. This will not only help a room feel bigger and spacious but also add dimension to a room.
What Are the Best Cove Molding Colors for Your Home?
Most experts agree that white is the best color to go for because it helps expand a room. If you have bright walls, white trim helps make the color pop and brighten up. It makes space look bigger against the bright colors; it adds a layer of dimension to the room that would not be there otherwise.
It gives it a crisp and sleek look. Wood trim with a brownish color can be a nice add-on, but it will not give you the same look the white does. It may make it feel more like a homey, and less modern but more family-oriented house. You can also take white trim and paint it several shades darker than the wall. This will add major depth, especially around the windows.
Tips on Doing Trim Yourself
There are a few tricks that you can do before starting the trim yourself. These are all great tricks if you plan on doing crown or cove molding yourself. However, if it looks too complicated, you should always opt for a professional. These are a few of the best tips to keep in mind when you’re doing crown trim yourself.
Research
You will need to know what you want to do and how to do it, but you will want to look at your favorite designs. Some designs may be better suited for certain kinds of walls. There are also designs that focus specifically on doors or windows.
Budget
Depending on what your budget is for home renovations will help you determine how many rooms you can do and which materials you can use.
Materials
Before starting, you will want to make sure you have the material you want, and all of it. You will want to measure the space, the design you’re going to do, and anything else. Certain materials will require you to special order them.
Layout
Lay all the materials out room by room. This will help double-check the number of materials you have and show exactly what you will need to do.
Cutting
Before you start to attach everything to the walls, you will want to measure and cut the pieces after laying them all out. This will help you keep the crown molding organized.
Adhesive
There are many ways to attach the trim to a wall. Before doing it permanently, you will want to test how you’re going to attach the trim. If you are using adhesive, do a test patch somewhere besides your wall, it should take ten minutes to harden and stick. However, if your trim is too heavy for the adhesive, it will not work. This is a crucial tip to make sure it works the way you need it too.
There is no easy way to add trim to your house unless you go through a professional, and then that will cost much more money. If you have the time and the tools, adding trim to your house can be a fun project that helps your home feel complete.
Conclusion
Crown and cove moldings are both trim but two different styles. One is not better than the other, and both will help you add value and sell your home faster. It depends on your style and taste as to which one you choose. There are many added benefits of each trim, and certain styles will work better depending on your home layout.
When in doubt, know that crown molding is one of the best ways to go, especially for budget-friendly design options to add a layer of luxury to your home.
Share this Post
Giovanni Valle is a licensed architect and LEED-accredited professional and is certified by the National Council of Architectural Registration Boards (NCARB). He is the author and managing editor of various digital publications, including BuilderSpace, Your Own Architect, and Interiors Place.