
Recessed lights (or canned lights) fit in perfectly with minimalist decor because they are both functional and discreet. Part of the installation process is figuring out how to evenly space them to ensure optimum lighting while maintaining the aesthetic.
To evenly space your recessed lights, apply a suitable spacing formula. Begin by determining the purpose of the recessed lights, then measure out the room to help you establish how many pot lights you need. Sketch out the plan to help you visualize the final results, then install as planned.
This article will guide you through the step-by-step process of evenly spacing recessed lights and cover valuable tips that you can use to simplify the process. I will also give relevant examples to help you have a better understanding.
1. Identify Your Lighting Needs
Recessed lights may be used for general, accent, or task lighting. Each of these lighting needs will affect the placement and spacing methods you use.
General lighting is where you use the recessed lights as the primary light source in the chosen room. In this case, you need a spacing strategy that allows for evenly dispersed light throughout the room while eliminating shadows and dark spots.
Accent lighting highlights ornaments and artwork such as paintings, photos, fireplaces, and flower pots. Recessed lights may also be used for accentuating and brightening up walls (also called wall washing). This type of lighting aims to draw attention or create a focal point around a particular object of interest.
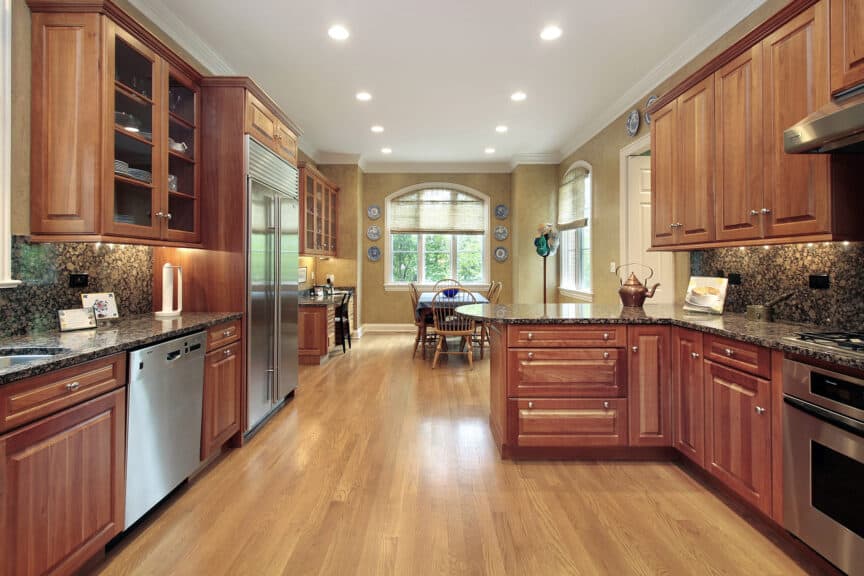
Task lighting, on the other hand, is meant to highlight a workspace, such as a kitchen countertop, shaving mirror, or reading desk, making it easier to attend to the associated detail-oriented tasks.
You may also install recessed lights to meet any combination of the above lighting needs.
2. Measure the Perimeter of Your Ceiling
Now, you need to determine the total square footage of your ceiling by measuring its length and width (in feet). Measuring in feet will make work easier for you as you do the necessary calculations for even spacing. Moreso, most measurement tools have the option to measure in feet.
Measure your ceiling height (distance from the floor to the top) because you may need this measurement in a future step.
I suggest measuring along a corner for more accurate readings since it may be challenging to maintain a perfectly straight line when measuring against a wall.
You can use a standard tape measure to measure the smaller rooms. Using a walking wheel or 100-foot tape measure may be more practical for larger spaces.
You will also get more accurate readings this way. I recommend taking each measurement at least twice to prevent reading errors.
Use the measurements to calculate the total area of your ceiling through the formula (length x width). For example, if the ceiling length is 20 feet (6.1 meters) and the width is 40 feet (12.2 meters), multiply 20 by 40, to get the total area of 800 square feet (74.3 square meters).
3. Draw a Sketch of the Plan for Better Visualization
A sketch will help you to visualize the final design as you plan. Sketch the ceiling on graph paper, and use the larger boxes to represent distance in feet.
Doing this will give you a better representation because it will be to scale. Another advantage of using graph paper is maintaining accuracy, which is of the essence as you aim to space your recessed lights evenly.
Moreover, you can sketch out different ideas for the recessed light placement and compare them to find the most ideal for your space.
Indicate the measurements you took earlier(ceiling length and width) on the sketch. Don’t worry about adding the rest of the details because you will add them as you progress.
4. Calculate the Total Wattage Needed (for General Lighting)
Wattage is the brightness level produced by a bulb, which you can calculate by factoring in some standard measurements. When determining the total wattage needed in a room, consider the following vital factors:
- The size of your room.
- The level of brightness you want to achieve in that room.
- The type of bulbs you wish to use (wattage. size, etc.).
- The height of your ceiling.
For regular ceilings (9 to 12 feet high), calculate the total wattage needed by multiplying the ceiling area by 1.5. For example, if your ceiling has an area of 200 square feet (18.6 square meters), using the formula (Area * 1.5), the total wattage required will be 300 watts.
To ensure the room is bright enough, you will need higher wattage for high ceilings (higher than 12 feet). Therefore, multiply the area of the room by 3. For example, for 200 square feet (18.6 square meters), you need 600 watts.
After determining the total wattage needed in the room, you can determine exactly how many bulbs you need. The number of bulbs will depend on the wattage of each bulb or the ones you intend to use.
Use the formula above (Total wattage needed divided by the wattage per bulb) to find the exact number of bulbs you need.
A valuable tip here is to select more prominent and higher-watt bulbs for high ceilings since they keep the room bright enough and accentuate the ceiling. For standard ceilings, you may opt for smaller bulbs, which give the illusion of a higher ceiling.
5. Determine the Number of Lights for Each Row and Column
Once you figure out how many recessed bulbs you’ll need to meet the wattage requirements in your room, you need to determine a suitable layout plan for even spacing.
One way to do this is by sketching different designs to see which fits best with the style and number of recessed lights you will be installing.
This method is best if you do not want to keep to the conventional parallel rows. You can also get some inspiration by looking at different designs.
The second method is to space out the lights into uniform parallel rows. For smaller or narrow rooms, arranging the lights into two rows works well.
However, consider three or four rows for larger spaces to distribute the light evenly across the room.
Depending on the number of rows you choose, you can determine the number of lights per row using the formula (Total number of recessed lights divided by the number of rows).
Remember to indicate this on your sketch for later reference.
6. Calculate the Spacing of Your Recessed Lights From the Walls
Placing your recessed lights at the proper distance from the walls will help prevent unpleasant shadowing and dark corners resulting from poor spacing. Moreover, it is crucial to maintain the aesthetic because it gives the illusion of higher ceilings.
The first method is spacing the recessed lights between 1.5 and 3 feet (18 to 36 inches) from the walls. This standard distance will arguably give you the best lighting effects by eliminating shadows and illuminating the walls.
The other method involves first establishing the spacing between each row of recessed lights (which I will explain in the next step), then dividing this distance by 2.
For example, if the space between recessed lights is 4 feet (48 inches), the distance from the wall will be 2 feet (24 inches).
Unfortunately, the second method may leave you with shadows and dark spots or corners where the spacing of your recessed lights from the walls is more than 3 feet (36 inches). Therefore, I suggest using the first method to eliminate this risk.
7. Use the Spacing Formula To Calculate the Distance Between Recessed Lights (for General Lighting)
The spacing formula will help you evenly space your recessed lights by giving you the exact measurements to use between the pot lights. The procedure requires you to divide the Total Number of Lights per Row by the Length of the Row.
However, before applying this formula, you must factor in the distance between the wall and your recessed lights.
If you want to retain similar measurements between the recessed lights as between the wall and the lights, then divide the number of lights per row by the total length of the ceiling. Then divide this length by (2) to get the distance between your first recessed light and the wall.
For better understanding, here is an example: If the ceiling length is 20 feet (6.1 meters), and each row has four lights, the distance between each pot light would be (20 feet divided by four lights), giving you 5 feet (1.5 meters).
Then, divide this by 2 to get the distance from the wall to the first light (on either side of the row), giving you 2.5 feet (0.8 meters).
On the other hand, if you want to use different measurements (for instance, where you choose to maintain the standard 1.5 to 3 feet (18 to 36 inches) between wall and lights), begin by subtracting the distance between the wall and lights, then divide the remaining length by the total number of lights per row.
For example, where the wall is 20 feet (6.1 meters) long, and the first light is 2 feet (0.6 meters) away from the wall, subtract 4 feet (1.2 meters) from the total length, leaving you with 16 feet (4.9 meters).
Assuming the row needs four lights, divide 16 feet (4.9 meters) (size of the row minus the distance between the first lights on either side and wall) by four bulbs to determine the spacing between the bulbs, which will be 4 feet (1.2 meters).
Remember to keep updating your sketch and noting all dimensions for a precise reference point during installation. It also helps you visualize the final look as you plan.
8. Select a Focal Point (for Task and Accent Lighting)
The focal point is the workspace or ornament you want the recessed lights to highlight. Once you identify a focal point, measure the distance from this point to the ceiling. That marks where the first pot light should go.
To evenly space out the rest of the recessed lights, divide the distance you measured (from the ceiling to the focal point) by 4. The answer will indicate the distance between the central and the remaining pot lights.
For example, if the distance between the focal point and ceiling is 8 feet (96 inches), then the rest of the pot lights should be spaced by 2 feet (24 inches) from the central light.
You may also combine task and accent lighting with general lighting. In this case, the focal point will mark the first light; you need to apply the spacing formula as explained above.
9. Install Your Recessed Lights (Preferably Hire an Expert)
Go over your sketch thoroughly and check for any inconsistencies you may need to address before installation. Doing this will save you valuable time, energy, and resources that you would need to spend correcting preventable errors after the installation has already begun.
If you have no previous experience installing recessed lights, it would be best to hire a professional to do the work for you.
The installation process is quite technical because it requires expertise in sensitive tasks such as wiring and troubleshooting potential electrical hazards, which you should not take chances with.
When choosing an expert, rely on verifiable referrals from people who have previously procured similar services. You may also search for qualified professionals around your area online.
Still, it would be best to be careful because some online reviews may not be legitimate (some service providers have been exposed to posting fake reviews to get more clients).
An excellent way to filter out charlatans is to only go with registered and certified individuals.
Final Thoughts
Recessed lights are a great lighting alternative because they are elegant, subtle, and functional.
You don’t have to be an expert to space your recessed lights evenly. Following the recommended procedure will help you achieve the desired results.
As I mentioned, it is essential to use a detailed sketch to help you visualize everything as you go. Furthermore, it will be a helpful reference point during installation since some details may slip your mind.
Finally, there are several designs that you can use, so you do not have to stick to the conventional parallel rows.
Sources
- Wikipedia: Recessed Light
- Light Up: How to Lay Out Recessed Lights in 4 Easy Steps
- Build: How to Calculate the Best Recessed Light Placement
- Hunker: How to Space Recessed Lights
- Jilsonia Interiors: Recessed Light Spacing
- Inspectapedia: Guide to Spacing and Layout for Recessed Lights
- Austin Handyman Services: How to Correctly Space Recessed Lights
- Mr. Spotlight: Recessed Light Spacing
- 1800 Lighting: Recessed Lighting Layout Tips You Need to Know
Share this Post
Giovanni Valle is a licensed architect and LEED-accredited professional and is certified by the National Council of Architectural Registration Boards (NCARB). He is the author and managing editor of various digital publications, including BuilderSpace, Your Own Architect, and Interiors Place.