
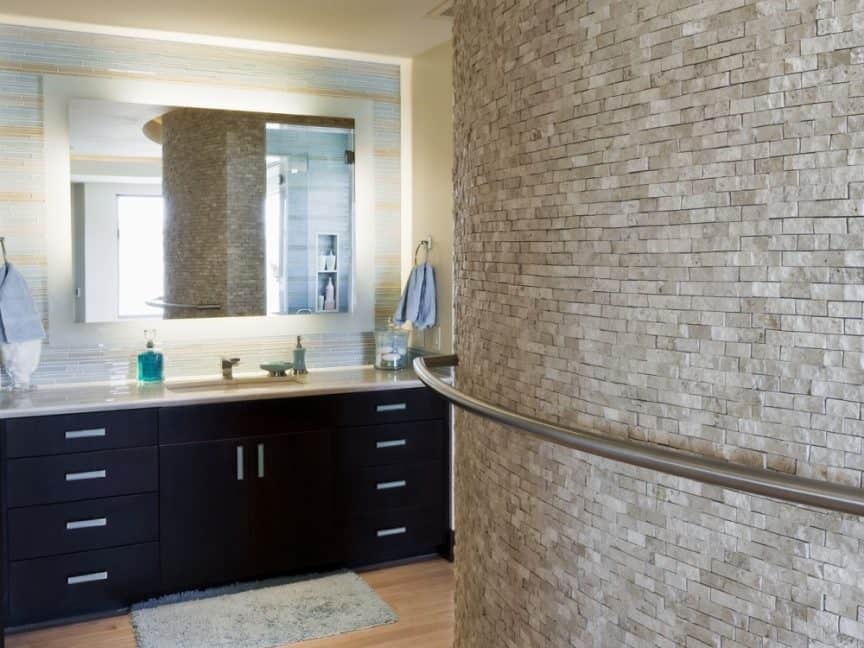
Tiling a wall can add an entirely new look to your home, but trying to tile a curved wall can bring a host of problems if you don’t know what to do. Luckily, there are ways in which you can get around the issue, resulting in a beautifully-tiled curved wall.
So, can you tile a curved wall? It’s possible, however, tiling a curved wall does take more precise work. To properly tile a curved wall, you’ll either need to use tiny tiles such as 1” x 1” mosaics or cut larger tiles to make them thinner. Doing so will make the tiles easier to manipulate around the bends of the wall.
In this article, you will learn how you can tile a curved wall, what you’ll need to get the job done, and other general tips to give you the best outcome possible.
The Best Tile for Curved Walls
As a general rule, the larger the tile, the harder it is to get it to conform to the shape of a curved wall. Purchasing larger tiles will only lead you to have to cut them down into multiple smaller pieces, which wastes time and often wastes tile (and your money).
When tiling a curved wall, like a shower or entryway, your best bet is to use 1-inch mosaic tiles. These tiles are significantly smaller than other tiles commonly used in the home and can be manipulated effortlessly for curved walls. This is because they come in sheets, with the small individual tiles glued on top, making them more comfortable to lay.
Mosaic tile also comes in a seemingly endless variety of colors (including multicolor), shapes, finishes, and textures to provide you with the exact style you’re envisioning.
So, while you can use those leftover tiles that you laid in your kitchen for the curved wall in your bathroom, it isn’t as efficient as buying mosaic tiles (and probably won’t turn out as appealing, either).
How to Tile a Curved Wall or Surface
In the following sections, you’ll learn, step-by-step, how to tile a curved wall or surface in your home. The steps are quite similar to laying other types of tile, so the process shouldn’t be too tricky if you’ve worked with tiles before.
What You’ll Need
Before you begin laying mosaic tile, there are a few tools you’ll need to gather.
These include:
- Tape Measure
- Unused Paint Rags
- Wet Saw
- Rubber Mallet
- Utility Knife
- Pencil
You’ll also need to make sure that you have the necessary materials for laying mosaic tile.
Materials to have nearby include:
- Mosaic Tile Sheets
- Thin-Set Adhesive
- Notched Trowel
Once you’ve gathered all of your equipment and materials for the tile wall, you’re ready to start laying it down.
Step 1: Make Sure the Curved Wall or Surface is Suitable for Tiling
Before you can begin applying adhesive, you have to make sure that the wall is ready to be tiled. Otherwise, the sheets may not lay as flat as they should.
- Remove any dust and leftover wallpaper or debris for a smooth surface.
- You can use sandpaper or a sander for larger walls to soften any rough areas.
- If the wall is inside a shower area, bathroom, or is outdoors, confirm that it’s completely dry.
Step 2: Dry-Fit the Mosaic Tiles (Optional)
Though this is an optional step, it’s a good idea to dry-fit the tiles, so you know exactly where and how you want them to go. This is especially good if you plan on using sheets of mosaic tile that are different colors, shapes, or textures on one curved wall. Dry-fitting will give you a better idea of what the final product would look like.
Have someone you trust hold the mosaic tile sheets in position. Do not attempt to use screws, tape, or any other tool to hold the tiles in place. This could result in broken or chipped tiles.
Step 3: Mark Where You Want the Tile to Go
Marking the positions of your tile is one of the most critical steps when tiling a curved wall. This will not only act as a guide for when you’re laying the tile, but it will also help to keep your tiles straight and aligned with one another.
Use a wooden or metal ruler or tape measure to mark out the wall vertically and horizontally (depending on how you want your tiles to look). Mark with a pencil to avoid any permanent mistakes when measuring.
Step 4: Cut the Tile Sheets to Fit Within Your Markings
Either using a wet saw or utility knife, cut the tile sheets in the joints down to the measurements of the sections you made on the wall with your pencil. To mark where you need to cut the tile, it’s recommended that you use painter’s tape and mark on it to avoid drawing on the tile itself.
Use a measuring tape to ensure that you have the correct dimensions to match the sections on the wall. Always wear goggles when operating a wet saw and use caution when handling a utility knife.
Step 5: Apply Adhesive and Start Tiling
Once your wall is ready to go and you’ve mapped out where the tiles will be positioned, you can then apply the adhesive and begin tiling the curved wall.
Here’s how:
- Start slowly tiling at a bottom corner of the wall or surface.
- Apply adhesive with your trowel, about 3-6mm in thickness
- Firmly press the sheet of mosaic tile into the adhesive enough to get the adhesive to seep through the cracks between each tile piece. This will form the grout.
- Use your rubber mallet to strike the sheet of tile, further embedding it into the mortar. Take care not to hit the sheet too hard, or else you could shatter the tiles.
- If you notice any gaps between the tiles, fill them in with more adhesive. This will increase their lifespan and keep them from peeling from the wall in the future.
Don’t worry about having to do anything special for the tiles to conform to the curvature of the wall. The tiles, because of their size and how they’re glued onto the sheet, will bend as you place and press them.
Step 6: Allow the Adhesive to Dry and Clean Up
After you have all the tile sheets laid, quickly (but gently) use a clean paint rag to wipe away any adhesive that may have gotten onto the surface of the tiles. You’ll want to remove any adhesive from the tiles before it has time to dry, or else cleaning will be made difficult.
Once you’ve removed excess adhesive, allow the adhesive to dry the tiles in place. Make sure the room is well-ventilated by opening windows and doors. Prevent any water from getting on the tiles until they’ve dried completely. Mosaic tiles will cure in place in about 30 minutes to an hour. Don’t use the shower or touch the curved wall until at least 24 hours have passed since application.
Final Thoughts
When it comes to laying tiles on a curved wall, the process is no different than laying tiles on a flat surface.
For the best results, and to save on cutting time, you’ll want to consider using mosaic tiles that are 2”x 2” or 1”x1”. These small tiles are more efficient and can handle the curve of walls more aptly than large tiles. Don’t forget that your measuring tape is your best friend when laying tile and to thicken the adhesive to 3mm for a more durable cure.
Sources:
- https://www.tal.co.za/home/index.php?ipkArticleID=98
- https://www.ehow.com/how_11368175_curve-wall-tiles.html
- https://www.diynetwork.com/how-to/rooms-and-spaces/floors/how-to-install-a-mosaic-tile-floor
- http://howtomatthew.blogspot.com/2009/05/installing-ceramic-tile.html
- https://www.usatileandmarble.net/blog/how-long-does-tile-installation-take.html
Share this Post
Giovanni Valle is a licensed architect and LEED-accredited professional and is certified by the National Council of Architectural Registration Boards (NCARB). He is the author and managing editor of various digital publications, including BuilderSpace, Your Own Architect, and Interiors Place.