
Those unsightly gaps around your shower or bathtub can quickly become more than just eyesores. If the caulk cracks or pulls away from the gap, water damage behind the tile or tub surround can start to happen. These leaks lead to loose tile, water damage to flooring, and possibly even structural damage due to damp rot.
Understanding why the caulk cracks or separates from the joint often tells you how to repair the caulk to prevent cracking and separation. Caulk around a bathtub or shower is usually the result of one or more of these factors.
- Use of the wrong caulk
- Inadequate surface preparation
- Flex or movement in the wall or floor of the tub or shower.
Repairing a bad caulk joint or caulking a new tile or tub surround installation doesn’t have to be a major project. If done correctly, you can caulk an entire tub or shower enclosure in a few hours, including the preparation and cleanup time. Following a few simple steps, using the right material, and having the right tools is the key to a successful caulking repair.
About Caulk
When you walk down the caulking aisle at the local home improvement store, it can be overwhelming with the choices that you face. Don’t despair. Your options should be clear, but to understand the options, let’s look at the caulking options.
- Latex Caulk – One of the most durable caulk materials on the market. You should use latex caulk on interior jobs where movement in the surfaces is minimal, and there is not a lot of exposure to extremes in heat, cold, or water.
- Acrylic Latex Caulk – Often referred to as Painters Caulk, acrylic caulks are the choice of professional painters when prepping surfaces for paint. Painters use acrylic caulk to seal gaps, fill holes, and create tight paintable joints. Clean up is easy with soap and water. Acrylic caulks are used indoors and outdoors but, unless painted, can be damaged by sunlight and water.
- Vinyl Latex Caulk – Vinyl latex caulks are used much like acrylic caulks but tend to be more durable. The surfaces to be caulked with vinyl latex caulk should be tight and have minimal movement since vinyl latex caulk is not very flexible after it cures and can crack.
- Silicone Caulk – Caulks made of 100% silicone are some of the most popular caulks found in the home improvement stores. Silicon is extremely flexible and durable when wholly cured and is waterproof. Silicon will adhere to almost any surface, which makes it ideal when closing a joint between dissimilar materials. The downside is that you cannot paint 100% silicone. Silicone Caulk is the choice of most professional when sealing joints in bathtub or shower enclosures.
These are the primary types of caulks you will find at your local home improvement store. There are various brands and manufacturers, but, overall, their products are comparable. You may find some other specialized types of caulk in small quantities, but these are for very narrow types of projects.
The Right Caulk for the Job
Unfortunately, many homeowners who want to spruce up their bathroom buy the cheapest tube of caulk that the home improvement store has on sale. This choice is usually acrylic latex caulk and, while it is superior at specific jobs, it can become a dismal failure in a wet environment or where there is flex or movement in the joint.
Using 100% silicone caulk for bathtub or shower enclosures is a better choice. Up until a few years ago, you could only source silicone caulk in the clear variety. Now, several manufacturers are offering colored silicone caulks, which can make your finished caulking job much more visually appealing.
Using 100% silicone caulk on your tub or shower enclosure will almost always solve your cracking or separation problems.
Surface Preparation
Many times, inadequate or improper surface preparation causes the caulk joint to crack or separate from the surfaces of the joint. Surface preparation is not complicated, but it can be tedious to perform correctly. In general, you want to make sure that:
- If you are re-caulking a joint in a bathtub or shower, you must remove all the old caulk from both surfaces to get proper adhesion of the new caulk.
- All the caulked surfaces must be clean and dry. Bathtubs and showers can build up a film of old soap and water deposits that will prevent the best caulk from forming a good watertight joint.
- Repair any damaged or loose tile before the joints of the bathtub or shower enclosure are caulked, including repairing any structural damage caused by leaking water. If the tube encloser is a kit design and has any flex or give at the joints, address these problems as well.
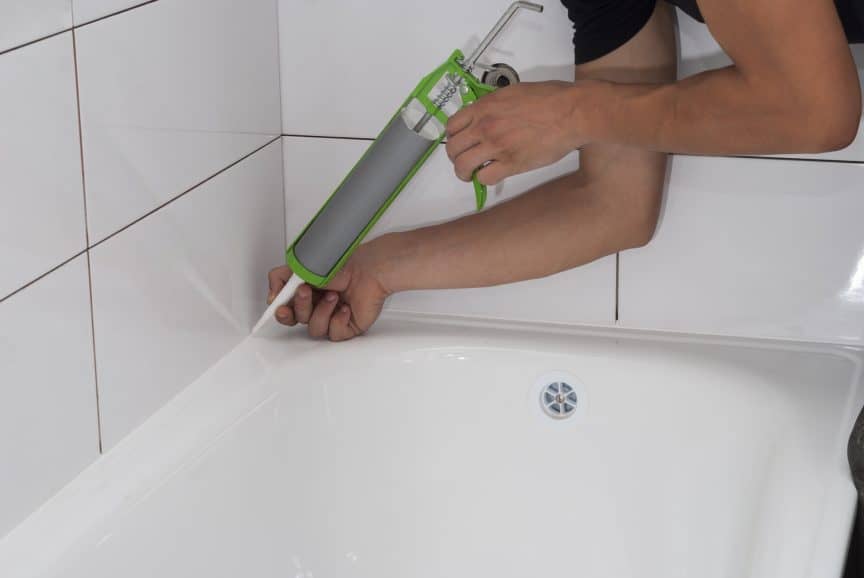
How do you Make the Caulk Joint?
First, patience is the key. Don’t try to go fast. It is better to work slowly and carefully. Experienced caulkers can run perfect seams with what seems to be incredible speed. That takes years of practice. Better to spend a little more time than end up with sloppy caulk joints that won’t last. A few tips and tricks will help you make those perfect caulk joints.
- Tape your joints – Professional tile setters and painters can run a caulk joint straight and true, leaving clean edges with no help. To get those kinds of joints, you can use green painters’ tape to mask off your joints. You should leave 1/8 to 3/16 of an inch gap on each side of the caulk seam. The goal is a caulk joint that is ¼” to 3/8 of an inch wide.
- Make your tube opening small – When you cut the tube opening, keep the tip opening small. A smaller tip is easier to control and helps keep the excess caulk from building up on the tip and in the caulk seam.
- Have plenty of paper towels handy – You are going to use a lot of paper towel to keep your hands clean and to make sure that the tip of your caulk tube is clean.
- Push or pull – The debate rages about whether it is best to push the tube over the seam or pull it down the seam. Both methods work. It is a matter of preference.
- Dress the caulk seam – When the entire length of the caulk seam is complete, top dress the seam by dragging your fingertip down the length of the caulk seam. This leaves a neat and attractive concave finish on the caulk and removes any excess.
- Use the Paper towel – Wipe off your finger, the tip of your caulk tube, and proceed to the next caulk joint.
- Remove the tape – It is best to remove the masking tape before the silicone caulk begins to cure. This will ensure that you have crisp straight edges and that you don’t pull the new caulk from the joint when you try to remove the masking tape.
- Follow the manufacturer’s recommendations – Silicone needs to cure before it is exposed to water or humidity. Follow the recommendations on the caulk tube and allow the proper amount of time for the silicone to cure before you enjoy that renovated bathtub or shower.
The Aftermath
A properly done silicone caulk joint should last for many years without problems. The look of fresh caulk with straight even seams can add to the beauty of your bathtub or shower enclosure. Recaulking these seams is one of the small things that we always do when prepping a house that is going on the market.
So, take your time, use the right material on a properly prepared surface, and follow our tips, and you can create professional-looking caulk joints that won’t crack or separate.
Share this Post
Giovanni Valle is a licensed architect and LEED-accredited professional and is certified by the National Council of Architectural Registration Boards (NCARB). He is the author and managing editor of various digital publications, including BuilderSpace, Your Own Architect, and Interiors Place.