
Drywall is one of the most common building materials for many walls and ceilings. It’s easy to work with and can be easily installed. It is relied upon because it creates clean finishes, is durable, and requires minimal work and effort if repairs are needed. While it is easy to install, there are some tips you should follow to achieve the best results.
You should install drywall on the ceiling before the walls for multiple reasons:
- The drywall on the walls can support the ceiling pieces
- You can create tight and fitted corners more easily
- The pieces are easier and faster to work with from the top
Hanging the drywall on the ceiling first is more straightforward and will lead to longer-lasting results that require fewer future repairs. Installing the materials properly the first time around will make your life easier in the long run. Hanging drywall on the ceiling first has been long practiced by contractors because it has proven to produce the most successful results.
Why Should You Hang Drywall on the Ceiling Before the Walls?
Drywall is the main component of the ceilings and walls in homes and buildings. You want this component to be solid and reliable so that it does not get damaged and remains sturdy. The order in which you install this drywall can significantly impact its reliability and durability.
There are three main reasons you should install drywall on the ceiling before the walls:
- Increased ceiling support: Wall pieces aid in supporting the ceiling.
- Tight and clean corners: Tight corners and clean edges can be created when the ceiling pieces are already in place.
- Simpler and faster work experience: Installation becomes easier as you work your way down instead of the other way.
We’ll dive into each of these factors so you can see why this ordering is essential. As trusted by contractors and DIYers, this strategy will make your drywall experience more effective and stress-free.
1. Increased Ceiling Support
The primary reason that you want to start with the ceiling pieces first in installing drywall is for additional support. When you attach the ceiling sheets first, you can reinforce them with the wall pieces, which will provide stability. The ceiling sheets will be further pushed into place and can put their weight on the wall pieces.
Screws and taping will keep the ceiling in place, but they shouldn’t be the only thing that the drywall relies on for support. Over time, the weight of the drywall may put tension on these adhesions and lead to cracking. This cracking and breakdown typically will occur around the edges. The good thing is the edges are also where the wall pieces will be placed to prevent this.
When the wall pieces are pushed up against the ceiling drywall during installation, some of the pressure on the drywall caused by gravity is relieved. The wall pieces are kept firmly in place by their own fasteners and taping with less gravity acting against them in their vertical positioning.
Support is especially important when another floor, attic, or even heavy insulation above the ceiling imposes even greater weight on the drywall. Here’s some additional information about why that support is essential.
You want to ensure there is as much support as possible to keep the ceiling intact and supported. Reinforcing the ceiling drywall with the walls is one of the best ways to create strong support.
2. Tight and Clean Corners
Placing the wall pieces up against the already installed ceiling drywall not only provides greater support but also results in a cleaner and aesthetically pleasing look. Drywall corners are known to be tricky and many tips are out there to help.
The drywall may be the outermost layer in the room, where you will want the edges and corners to have clear lines. Inconsistencies and gaps are eliminated when the wall pieces are pushed against the ceiling.
While you want these pieces to be tight against one another, make sure the joints are not too tight. Pieces of drywall that are too tight to one another can:
- Cause complete breaks: Wood will naturally contract and expand in the frame based on the time of the year. Think of these as tectonic plates that could rub against one another.
- Cracks: Too much support, especially with frame changes, can actually act as a negative pressure source. These can cause the drywall’s outer edges to warp and cause cracking.
Make sure there is enough space between your sheets to prevent these problems. You should keep a 1/8-inch space, which can be done with a guide. You can still maintain your clean and tight look and support without posing an additional burden to the ceiling pieces.
3. Simpler and Faster Work Experience
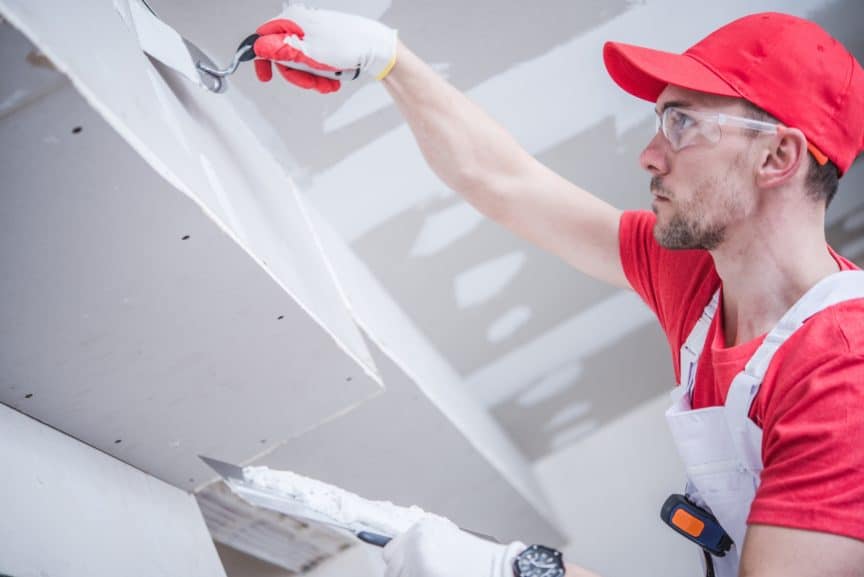
The ceiling is often challenging because you work above your head. If you start here, the rest of the process becomes much more manageable. You not only can fit everything tightly, but you’ll be able to work with the sheet in front of you instead of over you. Starting from the top, you can cover the largest surface area and adjust sizing as you work your way down.
Pushing the drywall snugly against the ceiling to ensure a good fit is easier. You can then work with the left-over gaps at the bottom. Baseboards will cover the remaining space, whereas you might not know how much space to leave if you start from the bottom.
Tips for Installing Drywall
The ordering of your drywall installation will help to improve the structural stability as well as the cosmetic appearance of the application.
There are a couple of tips you should keep in mind when installing your ceiling and wall pieces:
- Start with studs: You want to make sure your paneling begins on the stud so that it attaches firmly to the foundation of the building. This will help to ensure security from the start.
- Direction matters: This depends on the studs you are working with. If you use wood studs, you should hang the drywall horizontally versus vertically with metal studs. Generally, the rule is to hang horizontally so the sheets have more contact with the studs. It is important to note that the drywall must be hung vertically for commercial buildings to adhere to fire codes.
- Work your way around the room: Once you have installed the ceiling pieces, do the entire top section of the paneling to support the entire ceiling piece evenly.
- Use big sheets: This will eliminate the need for you to do more tacking and screwing on multiple pieces. Larger pieces will be more durable and will require less work to keep supported.
- Drywall should be tight against the wall: Not only do you want the pieces of drywall to be tight against one another, but you should press firmly onto the drywall so it adheres tightly to the structure beneath. Make sure your screws are fastened tightly but that the depth of the screw isn’t depressed into the drywall.
By installing your ceiling drywall before the wall pieces, you can establish better overall structural quality and support, maintain an overall finished look, and make it simple to install drywall by yourself! It is much easier (and cheaper) to install drywall properly from the beginning, so you won’t have to do avoidable repairs down the road!
Share this Post
Giovanni Valle is a licensed architect and LEED-accredited professional and is certified by the National Council of Architectural Registration Boards (NCARB). He is the author and managing editor of various digital publications, including BuilderSpace, Your Own Architect, and Interiors Place.