
Affiliate Disclaimer: Some of the links below are affiliate links. As an Amazon Associate, I earn from qualifying purchases.
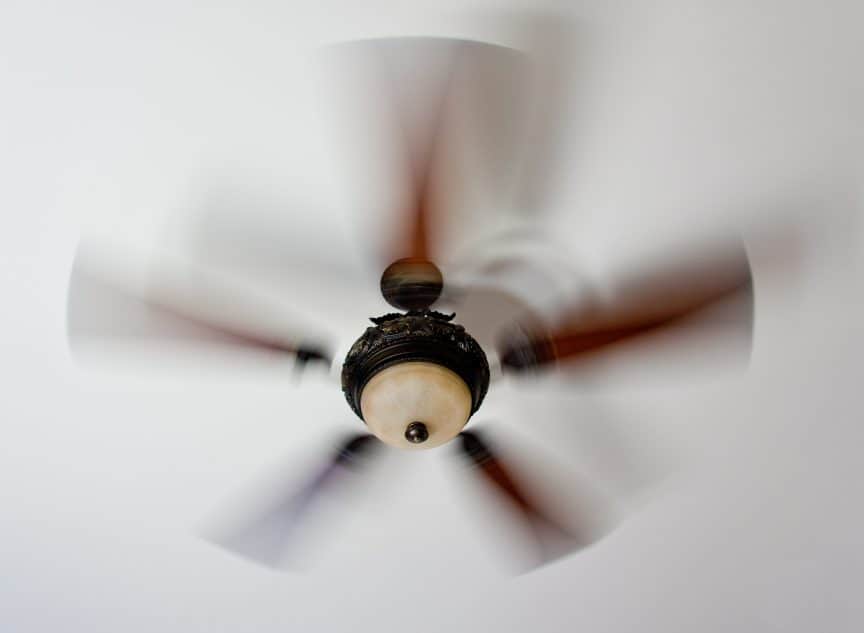
You’ve just settled down with a nice book on a hot summer’s day, a cold glass of lemonade, and a cool breeze wafting through the room from your trusty ceiling fan…but wait. Is it supposed to be rocking back and forth like that?
If your ceiling fan is rocking back and forth, it could be that the blades have uneven weight, are misaligned or are warped or bent. Use weight clips to correct the imbalance and fix the alignment. It can also be loose blade screws or box mount, so tighten those screws and install the fan properly.
If you’re having issues with your ceiling fan, this article will help you identify possible reasons why it’s wobbling and how to fix it. Fixing a fan isn’t a one-step process, though, so we’ll also take a look at how to maintain your ceiling fan to avoid future rocking, creaking, or wobbling.
6 Reasons Why Your Ceiling Fan Is Rocking Back and Forth
Here are some of the reasons why your ceiling fan is rocking back and forth.
1. Uneven Ceiling Fan Blades
The most common culprit? Unbalanced ceiling fan blades.
When your ceiling fan’s blades aren’t properly balanced or aligned, they will rattle, and they will cause a racket. Sometimes, all the blades may not be of the same weight, and you might find that one or more are either heavier or lighter than the others.
What To Do
Use a Fan Blade Balancing Kit
A balancing kit usually comes equipped with various weights and appropriate balancing clips to help weigh the blade in question, such as Frienda Ceiling Fan Blade Balancing Kit, which can be purchased from Amazon.com. Just follow the instructions posted on their product page on how to attach the weights.
To check if the weights work:
- Turn on the fan and run it through its different speeds, from low to high.
- Check if the wobbling has stopped.
- Adjust the weights accordingly to find that perfect combination.
Use a Penny
Alternatively, you’ll find that many people just fix a penny to the top of the blade. You’ll need to use good-quality masking tape to make sure that the penny is secured firmly in place atop the blades.
In for a penny, in for a pound, right? So keep tweaking the number of pennies you attach until you get that perfect formula for a wobble-free ceiling fan.
Consider the Best Place To Attach the Weight
You can try out different placements until you figure out the best possible location to attach your weights.
Here’s how you do it:
- Start from the center, near the base.
- Work your way up by moving the weight clip or the penny up towards the ends of the blade.
- Move in increments of an inch or two at a time.
- The best way to tell if you’ve gotten it right would be to turn on the fan and check whether it still wobbles at different speed settings.
This might seem like a chore, but it’s crucial that you balance the weight of your fan blade to avoid rocking and increase the longevity of your fan. Why? When your blades aren’t balanced, there’s an increased possibility that the motor will wear out faster. So all the blades must be evenly weighted to balance out their rotation.
2. Loose Ceiling Fan Blade Screws
Did you know that your fan blades should ideally be angled to a minimum of 12 degrees? This is considered the optimal angle for your blades to function and circulate air better. Anything below is considered too loose, and anything above is just going to whip up a whirl of dust.
If you find that your ceiling blades are sagging, the simple reason might be that the screws have loosened over time. Quite often, all your fan needs to stop rocking back and forth is a good tightening of its screws, so check the base of the flywheel, where the blades all converge.
What To Do
Tightening the screws, I’m happy to say, doesn’t require a degree in mechanical engineering. Just go ahead and grab a screwdriver and drag your ladder in place. You’ll find the screws in question at the base of the flywheel.
Ensure that you tighten all the screws, including the set screws that prop up and hold the twist-on downrods in place. If you think you’ve got them all, tighten them again. You might need to remove the covering or canopy that attaches the fan to the ceiling to tighten all the screws.
3. Misaligned Ceiling Fan Blades
What are misaligned fan blades, you ask?
When your fan blades aren’t equal in weight when their angle is off, and they’re all but sagging, that’s when you can tell that your fan blades are misaligned. So how is it different from what we’ve already mentioned?
Unequal weight and loose screws are just two reasons why your blades are misaligned and why your ceiling fan is rocking back and forth like it’s possessed.
There’s also this minor issue of an unbalanced center which is really why you’ve got a misaligned fan on your ceiling. The base or the fan where the rotatory device is is considered the center of the mass. When this center is off-kilter, your ceiling fan will rock more than The Beatles or The Rolling Stones ever did.
Why Does This Happen?
The center of the fan is your fixture, where the rotor is. If that loses its rigidity and becomes loose—either from everyday use or a faulty screw—the center is moved off course and will create a decompensation. What this means, in layman’s terms, is that your fan will become misaligned and imbalanced.
This theory applies to all fans, and not just your ceiling fan.
What To Do
What you can do to keep on top of this situation is to regularly check your rotary center to ensure that it’s properly aligned.
You can also check to see if the blades are aligned and are at the right angle and height. To do this:
- Hold up a yardstick against the ceiling.
- Line up the blades to measure the height from the ceiling to each of the blades.
Remember that the blades are tilted in that they’re naturally angled, so always check the same edge while measuring.
4. Warped or Bent Ceiling Fan Blades
Sometimes, one or more of the blades might be a little bent out of shape. Depending on just how bent they are, it could mean they’re damaged, or it could mean they’re a few inches off the correct alignment. Either way, a bent blade will just as easily make your ceiling fan rattle.
What To Do
If they’re just out of alignment, you should:
- Check the height of each blade to figure out just how bent they are.
- Apply gentle pressure and press the blade carefully up or down to bring it back into alignment.
Don’t press or push the inner part of the blades near the base. This part is usually attached to a blade holder, and you might end up damaging it in an attempt to align it.
5. Loose Ceiling Fan Box Mount
Have you noticed the top part of the ceiling fan, where it’s connected—mounted—to the ceiling? Is that where the rattling is originating from? A loose box mount means that your fan hasn’t been installed or mounted correctly.
While most blade-related rattling doesn’t necessarily mean your fan is going to take a swan dive, a loose mount is more than enough cause for concern. So don’t use a ceiling fan with a faulty or loose mount.
What To Do
The fan is typically mounted to a box; if it’s loose or faulty, then it’ll move around. Check to see if the box in question is the appropriate one for your ceiling fan. Ideally, you shouldn’t be able to move it around, but if it’s the wrong type of box, it’ll need to be replaced, and this might just need that mechanical engineering degree (call a professional).
6. Ceiling Fan Showing Signs of Dirt and Disuse
If you haven’t used your ceiling fan for a while, and you haven’t cleaned it, then there’s a good possibility that you’ll find signs of disuse and accumulated dirt on the surface of the blades.
A poorly maintained fan will make a lot of noise and rattle, yes. But when it’s dirty and grimy, it’ll be circulating pollutants, dirt, and dust particles around your room.
Luckily, there’s an easy enough solution: cleaning. Here are some tips you can do:
- Use a pillowcase to cover an entire blade and gently slide the fabric over the blade to remove the loose dust. Repeat this step till you’re satisfied you’ve taken out as much of it as you possibly can. If you’re using a duster, remember to lay out some old newspapers to catch the dust. Also, always protect your nose and mouth when dusting.
- Use baby wipes or multi-surface cleaners and rub off the dirt and grease from the blades and the base and neck of the fan. Alternatively, you can use rubbing alcohol and cotton rounds to the same effect. Dispose of the dirty swabs and wipes.
Conclusion
Your ceiling fan is rocking back and forth because of several reasons, including uneven blades, loose screws, and incorrect installation. But ultimately, keeping your fan clean will help keep it well oiled—so to speak—and in good, clean, and adequate working conditions.
So while you can always fix a wobbly fan on your own, if you’re not too sure about the procedure, or you’re worried you’ll just do more harm than good, then go ahead and have an electrician in to inspect and fix your ceiling fan.
Sources
- YouTube: How To Use A Ceiling Fan Balancing Kit
- Wikihow: How to Balance a Wobbly Ceiling Fan
- Home Depot: How To Balance a Ceiling Fan
- Power-MI Blog: Diagnosis of Unbalance in Fans
- New World Encyclopedia: Ceiling fan
- Wikihow: How to Fix a Wobbling Ceiling Fan
- Scharff, Robert. 1983. The Fan Book. Reston, VA: Reston Publishing Co, Inc. ISBN 0835918556.
- Parker, Philip M. 2006. The 2007 Import and Export Market for Table, Floor, Wall, Window, Ceiling or Roof Fans with Self-Contained Electric Motor of an Output Not Exceeding 125 w in the United States. San Diego, CA: ICON Group International, Inc. ISBN 0497654598.
Share this Post
Giovanni Valle is a licensed architect and LEED-accredited professional and is certified by the National Council of Architectural Registration Boards (NCARB). He is the author and managing editor of various digital publications, including BuilderSpace, Your Own Architect, and Interiors Place.