
T-Molding is an essential part of the smooth transition from room to room, especially in homes with mixed flooring. You’ll likely need some T-Molding under doorways or between living spaces to create a seamless transition between floors. But what should you do if it’s not snapping in as it should?
If your T-Molding doesn’t snap in properly, measure the distance between floors to determine whether T-Molding is required, inspect the track for damage, secure the track with screws, or use liquid nails to secure the T-molding. Cutting flooring to create more space for the track can also help.
Read on for an insightful discussion on how to address T-molding that just won’t snap into place. I will go over the basics of T-Molding installation to give you some context and then cover what to do if you’re having issues with the track. Let’s dive in.
How To Install T-Molding
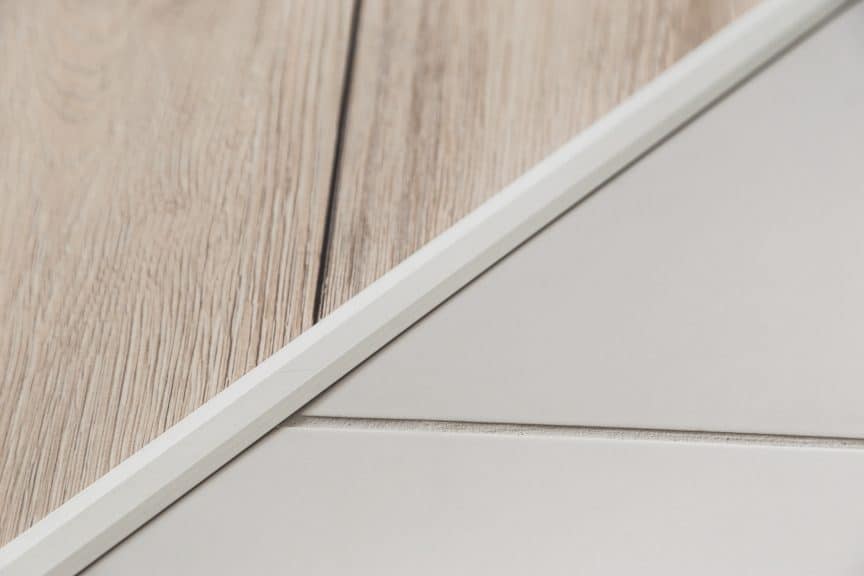
T-molding is used to fill the space between two different floor sections (namely under a doorway or between two rooms). You may have concrete in this section a few inches below or a different material, like wood.
T-Molding gets its name from its “T” shape and will snap into a track between the two different sections. To install it, you’ll need:
- Measuring tape
- Electric saw
- Construction adhesive
- Duct Tape
During installation, you’ll usually measure out how long the space between the two sections is. T-Molding sections come in various sizes, but you may still have to use an electric saw to cut the T-Molding and the track to size. Otherwise, it won’t fit. If you do too small of a section, you risk things falling in and the T-Molding moving around.
After measuring and cutting everything to size, you’ll lay the track onto the floor and snap the T-Molding in. Usually, it’ll stick with a day or two of duct tape or heavy objects holding it down.
This video shows how you can install T-Molding:
Make sure to follow the directions provided on your specific brand of T-Molding. Even if you’ve installed T-Molding hundreds of times before, a new brand might have a different or modified step, and skipping might cause problems.
Things to Try When Your T-Molding Fails to Snap-in
If your track and T-Molding just won’t snap even after proper installation, one of the solutions below might help.
Measure the Distance Between Floors to Determine Whether T-Molding is Required
If you’re having issues right off the bat, you might need to check and see if a different type of molding would do better. For example, you’ll usually use a reducer between two different-sized sections of flooring or an end-cap if you’re switching between carpet and a hard floor. Too big of a gap between floors will result in the T-Molding being uneven on one side, therefore preventing the track from sliding in.
Measure the distance between the two-floor sets and ensure that T-Molding is actually what you need, not an end-cap or a reducer.
Inspect Your Track for Damage
One of the most important steps in installing your T-Molding is cutting down the molding and the track to size. As you do this, it’s very likely that your track will get damaged or bent regardless of how sharp your saw’s knife is. This is particularly true if your track is made of plastic.
Typically, tracks aren’t made of materials resilient enough to withstand the force of a saw, so the molding bending one way or another might be why your T-Molding won’t snap in. If this is the case, try your best to work the plastic back into shape without bending it.
If the distance between the two floors is pretty much the same, you can also snap your T-Molding into the track before placing it between the two floors. This way, you can set the T-Molding already snapped into the track down between the two sets of floors.
Additionally, dirt or debris could’ve fallen into your track. Ensure nothing stops the T-Molding from snapping directly into the track through thorough observation beforehand.
Use Liquid Nails to Secure the T-Molding
Liquid nails is a lifesaver for many home renovation projects, and fixing misbehaving T-Molding is no exception. If you have entirely bent your track out of shape and don’t have the money or the resources to grab a new one, try using liquid nails to get your T-Molding to snap in properly.
Before trying this method, make sure that the T-Molding will fit into the track, even if it doesn’t completely snap. Once that’s out of the way, glue the T-Molding into the track.
Here’s how to do that:
- Line the inside of the track with your liquid glue or adhesive
- Put the T-Molding back in.
- Place the molding down between the two sections of the floor and glue it as usual.
- Use duct tape or a heavy object to hold it down for twenty-four hours, so nothing pops back up.
Use Screws to Secure the Track
If something is going wrong with your T-Molding and track, like your track bending every which way before your T-Molding can get into it, you may want to use a screw or liquid screws to keep your track in place.
As mentioned before, sometimes a track will get bent or damaged in the process of cutting it down to size. If you can manipulate the track just enough to get your T-Molding in it when it’s not on the floor, it might be worth it to try and nail or liquid-screw the track into place on the floor.
Cut the Flooring to Create Enough Space for the Track
Another potential explanation for why your track just doesn’t snap is the lack of enough room for it to sit correctly on the floor such that the T-Molding easily snaps into place. This is likely the case if you’ve been doing a lot of home renovations on your own. The distance between the two sets of floors may be too small for proper T-molding installation.
If your track has to bend, fold, or flex in any way to get between the two sets of flooring, that might jeopardize its ability to snap with the T-Mold. If this is the case, you need to measure and cut the floor to minimize the distance between the two sets of floors.
This method is only suggested if you can measure and cut your floor properly. Otherwise, you might end up creating bigger problems. You should also be sure it’s not an issue with your T-Molding and track (i.e., they snap together perfectly when they are above ground). You’ll find yourself having the same issue once the floor is cut if it’s a problem with your track or T-Molding, not the distance between your floors.
Conclusion
T-Molding may not be a very noticeable or glamorous part of your home, but getting its installation right is essential. It can be challenging to troubleshoot and fix T-Molding and tracks that won’t work together.
If you can’t fix your T-Molding or track, it might be time to enlist professional help or start fresh with a new piece of T-Molding. Otherwise, any of the above DIY fixes should get your T-Molding to snap into place.
Sources
- YouTube: How to Install a T-molding – Glue Down
- SF Gate: How To Install Wood T Molding
- EasiKlip: Install Your T-Molding Strips Like A Pro
- Moldings Online: Installing T Molding with a Floating Floor
Share this Post
Giovanni Valle is a licensed architect and LEED-accredited professional and is certified by the National Council of Architectural Registration Boards (NCARB). He is the author and managing editor of various digital publications, including BuilderSpace, Your Own Architect, and Interiors Place.