
Often, the most challenging part about do-it-yourself home repairs and renovations is figuring out all the bits and pieces. If you have added or replaced a door, how do you know what baseboard to use to make a seamless and great-looking finished product?
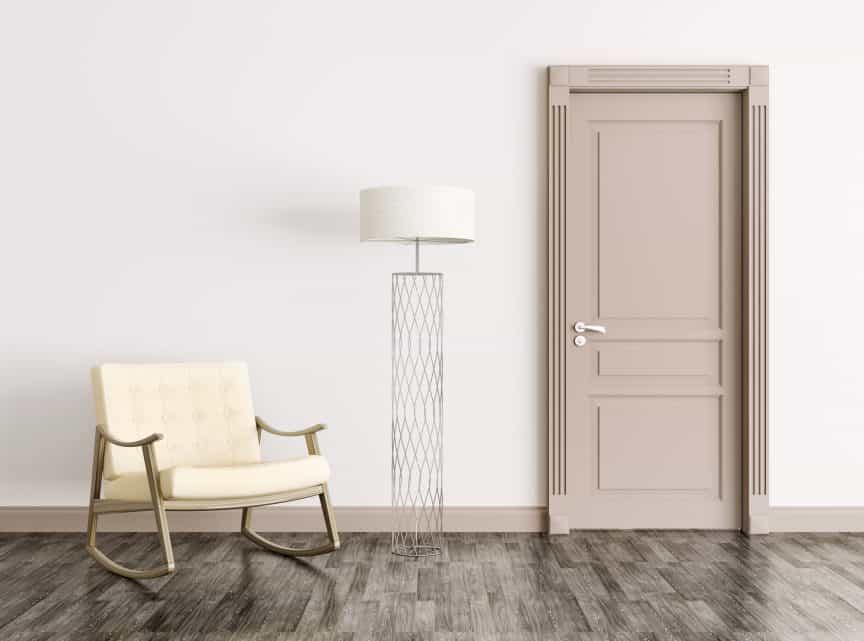
There are many variations when looking at door trims, baseboards, or any decorative molding. As a general rule, door trim, or casing, will usually be about one-eighth of an inch thicker than baseboard. The reasoning behind this is to create a relief between the casing and the baseboard.
Your personal tastes will also inevitably play a role in your selection. There is an endless selection of thick, thin, double- and triple-layered, ornate, and plain semi-rounded shapes to choose from. You may prefer thicker baseboards or even the same thickness as your door trim.
Average Thicknesses and How They Stack Up
Door casing, or trim molding, is the decorative edge around a door frame. The primary purpose is to hide the “guts” of the door frame where it fits into the cutout area. These are generally rough dimensions used in construction. These general-sized fittings allow homeowners to replace doors in their homes if desired.
The average thickness for door casing is one-half inch (1/2-inch). It can be as thick as three-quarters of an inch (3/4-inch). Door and window trim are usually the same within a room. This creates a visual flow and helps the aesthetics of the room.
Baseboard is the decorative trim around the base of walls in rooms, hallways, and foyers. Thickness can range up to three-quarters of an inch. A general rule followed by most installers is to keep the baseboard thickness about one-eighth inch thinner than door and window casings.
This creates a slight relief at the base of the door frame and allows for slight imperfections in how the door is hung. Some installers will add a strip of half-round trim to the baseboard. This also covers slight flaws or irregularities in flooring that create gaps under the baseboard.
Different Cuts for Different Looks
Going to the lumber warehouse can be an overwhelming experience. When you enter a lumber store or home improvement warehouse, the different types of trim available will leave you gobsmacked. There are variations for all tastes in design, from a plain, rounded edge look to ornate ridged patterns with inlaid rosettes for the corners.
If you are matching the existing trim, you will want exact measurements. It is best if you can carry a small piece of the existing trim to compare. You can be assured that you are getting an exact match with a direct comparison.
When matching trim to the baseboard, you don’t have to be so exact. Some people prefer a plain trim with a more ornate baseboard or vice-versa. Most people go for a similar look in baseboard and trim selections, but the choice is yours to make.
You don’t have to have a preconceived concept when you go shopping. Hold different boards together and see how they look. Some are already matched; others will be mix-and-match styles.
Door Trim
A quick note on measuring to make sure you purchase the correct amount of casing material. Measuring is probably the single most important part of any remodeling job.
- Always measure along the outside edge of the existing door trim
- Add six inches to each measurement for cutting
- Use a miter saw for perfect 45-degree angles
- Make a fresh 90-degree cut at the bottom edge before measuring your new board
- ALWAYS measure twice and cut once
Having correct measurements means only one trip to the lumber store. Boards are sold by the foot and often come in pre-measured sizes. Many stores have a cutting station, either for customer use or managed by an employee. This allows you to buy only what you need, but remember to account for extra inches to make your cuts.
This is a good video for door trim installation.
Baseboards
Measuring baseboards should be done at the lower edge. Measure the entire room and add your totals. For smaller rooms, you can use single pieces for walls less than 8 to 12 feet. Remember to add at least six inches per wall for cuts.
For baseboard cuts, you will need to cut your boards for corners from top to bottom to make a 45-degree angle. You can usually rent a compound miter saw from most local home improvement warehouses for a day. Rentals are relatively inexpensive, and the rental staff can show you how to operate it correctly.
When piecing together two boards for longer walls, use an angled cut at the seam for a more flush-finished look. The only “square” edges on baseboards will be where they butt up against your door trim.
Here’s a video on baseboard installation that may help you.
Wood Vs. Man-Made Materials
Whether you use real wood or man-made materials is another of those personal preferences. While most builders prefer to work with real wood, less expensive options are available.
Types of Wood
If you plan on staining your trim and baseboard for a natural look, the best choice is hardwood. Although an expensive choice, Oak delivers an excellent look and adds a polished look to any home. You may also opt for mahogany, maple, ash, and other hardwoods.
You will need a wood filler to fill the dots left from your finishing nails. When shopping for hardwood trims, always check carefully for warping and splitting.
Pine is a natural wood choice that is very popular due to its lower cost. It will take stain or paint and is relatively easy to work with. Pine trim is generally free of knots and is available either primed for paint or unprimed for a natural finish.
Check it for obvious imperfections, knots, warping, and splitting when purchasing. Use care when cutting your pieces to avoid splitting. It is softwood, so it is also more susceptible to nicking and denting both during and after installation.
Synthetic or Man-Made Trims
A man-made material that is proving handy for painted trims and baseboards is medium-density fiberboard (MDF). It is made using wood fibers, resin, and other filler materials, which are then compressed and shaped. It can be cut and worked like real wood but doesn’t look great when using stain. If you opt for painted trim and baseboard, MDF is a great budget choice.
An even cheaper option is polyurethane molded trims. These are usually sold primed for paint. They are not suited to natural finishes but can be purchased with a wood-like coating. They look artificial, though. These can be cut with a sharp razor knife or on a saw like real wood, but they are very fragile. Unless your budget is extremely tight, this isn’t a good option for longevity.
Making Every Cut Count
Measure twice, cut once. This concept can never be stressed enough for any home improvement project. Accurate measurements mean tighter fitting joints and a better-finished look. This also saves material costs; you won’t need to run out to replace poorly cut boards.
This video has great information for marking and cutting angles for trims and molding.
It’s Time to Get Busy
Now you know the basics about door trim and baseboard thicknesses. Remember, the general rule is that door trims will be slightly thicker than baseboards. There is no hard and fast rule, so if you want a different look – go for it.
Share this Post
Giovanni Valle is a licensed architect and LEED-accredited professional and is certified by the National Council of Architectural Registration Boards (NCARB). He is the author and managing editor of various digital publications, including BuilderSpace, Your Own Architect, and Interiors Place.