
Styrofoam is used in a variety of applications because it is inexpensive, lightweight, and easy to work with. The primary downside is that it doesn’t blend in well with its bright white color and widely considered unattractive. Fortunately, you can paint and decorate your Styrofoam to look like nicer materials, including wood.
How to Paint Styrofoam to Look Like Wood in 9 Steps:
- Identify desired wood look
- Acquire Styrofoam and painting materials
- Prime and seal Styrofoam
- Sand and carve Styrofoam
- Paint first coat of Styrofoam
- Allow paint to dry
- Add additional coats
- Dry brush details
- Add additional wood grain details
By following these steps, you can effectively make Styrofoam look like wood, allowing you to adapt the material to fit into any wood setting or make this material look much more durable and upscale than it is. Let this be your guide to making your Styrofoam look like wood most believably.
How To Paint Styrofoam to Look Like Wood in 9 Steps
To make your Styrofoam realistically look like wood, it will take more attention and time in both the detailing and painting processes. Acquiring the best woods and stains to match your desired wood coloring is important as well as using quality products so that they will be durable and long-lasting.
1. Identify Desired Wood Look
Before you purchase any tools or materials, you will want to have a clear idea of the wood you plan on modeling the Styrofoam after. There are a variety of wood types to choose from, so consider where you will be placing the Styrofoam and the colors and grain that may go with the surrounding environment best.
While it will require more work, you may want to choose a wood that has more knots and heavier grains. This could provide you with a more obvious wood look if that is the style you are going for. If you are trying to model your design after a specific styling, woodier grains tend to look more rustic.
Here are some of the major wood types you can try and model your cardboard after:
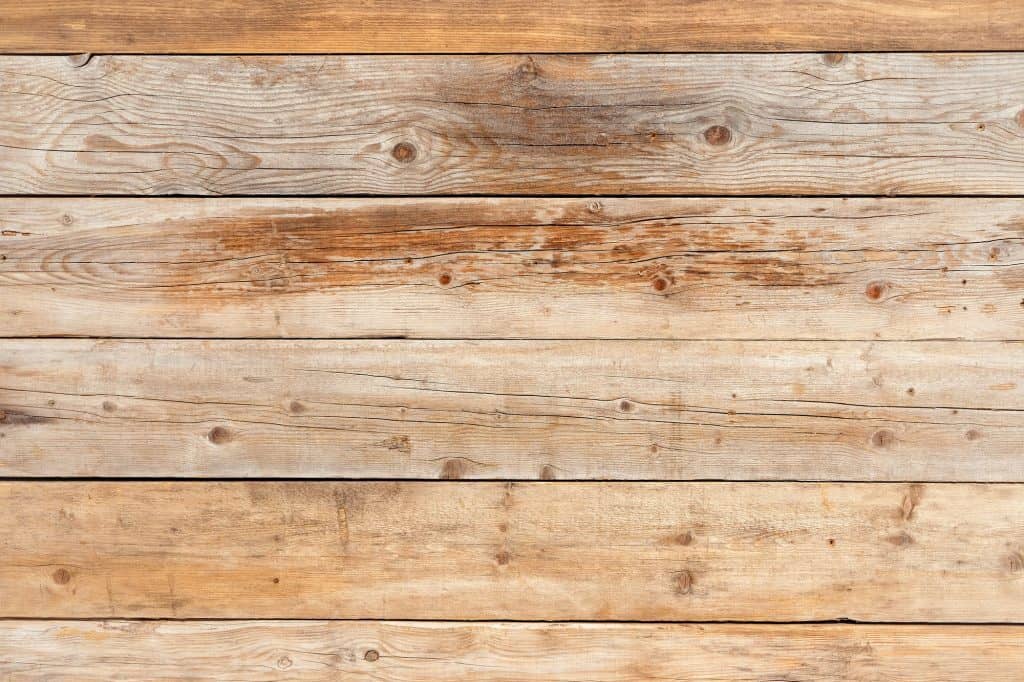
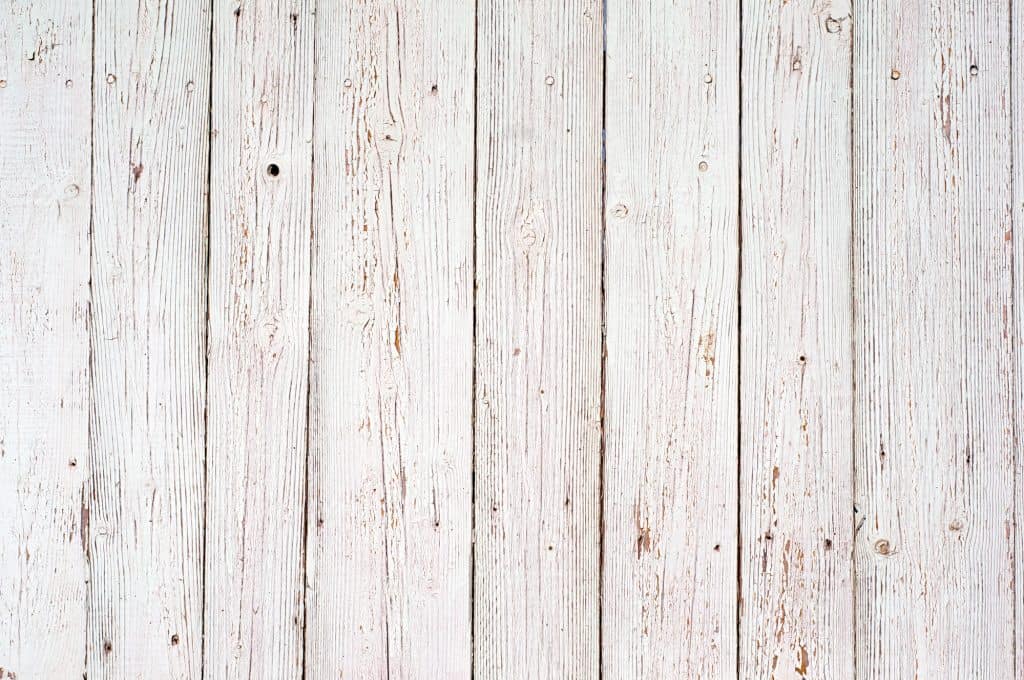
- Pine: On the lighter side color-wise, pine has a very faint grain in both texture as well as color. If you are looking for something that will blend in well with existing woods, you may want to paint your Styrofoam in these tan hues.
- Cedar: This wood has a slight red hint, straight grain, and may have a couple of knots here and there. Cedar is popular because it looks great in both indoor and outdoor settings.
- Redwood: As its name suggests, this wood features a red tone, and this is typically used in outdoor settings.
- Oak: White oaks are typically used inside for furniture because of its attractive appearance. These grains are more obvious, but not too dark in color to be overwhelming. Oaks are one of the lighter in color with tan tones.
- Maple: Maple is a pale wood that has interesting grain markings that are swirly and wavy. This could be fun to replicate in the foam.
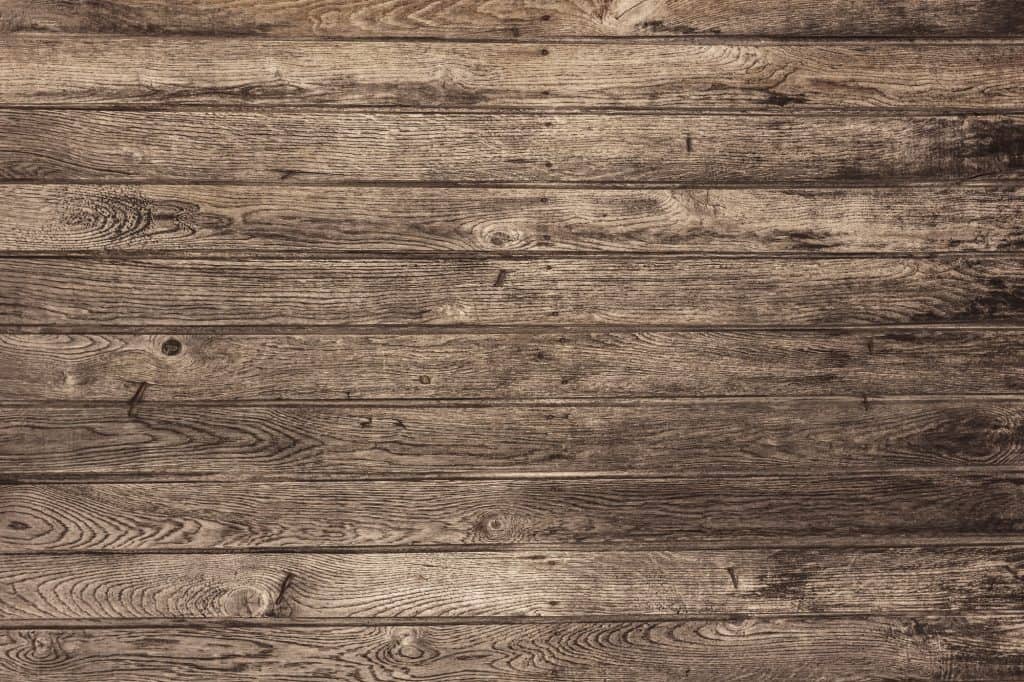
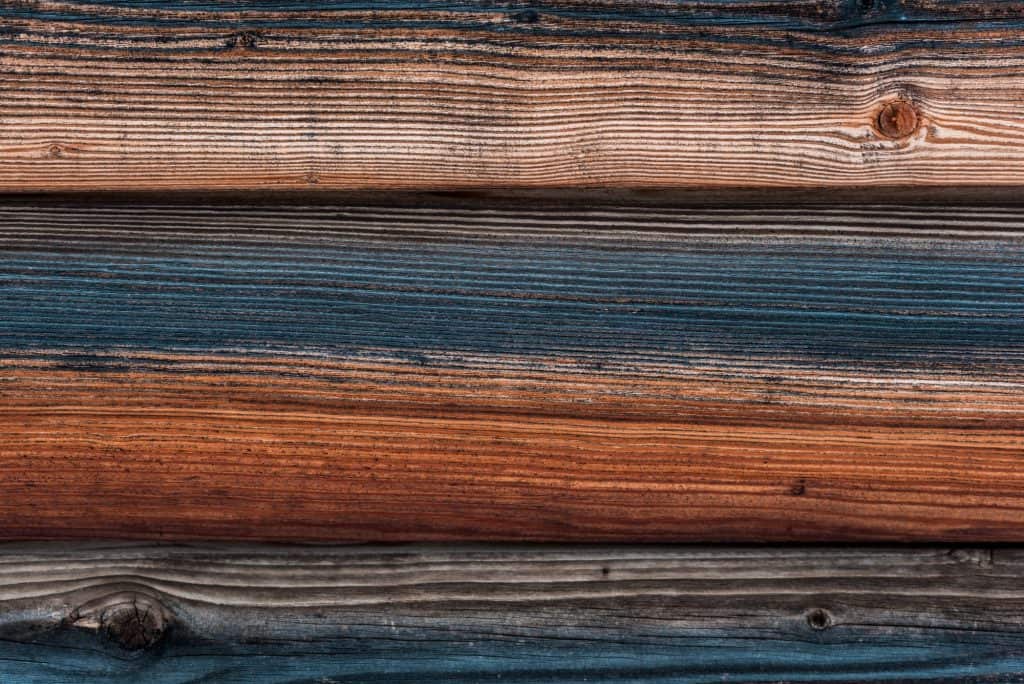
- Walnut: Walnut can come in multiple shades, but it is typically known for being darker browns for a more rustic feel. It has a straight grain you can work into the foam.
- Mahogany: With thicker knots and rings to show the age of the tree, you can find this expensive wood type in dark browns and reds. This can provide a more high-end look.
- Cherry: Smooth grains and rich reds make cherry a unique and desirable wood.
For your Styrofoam, it’s usually best to go with darker brown woods because it will be easier to hide imperfections and patterns associated with the plain Styrofoam. You will be able to see details with grain, but lighter colors of paint and stain can be more difficult to match and look realistic.
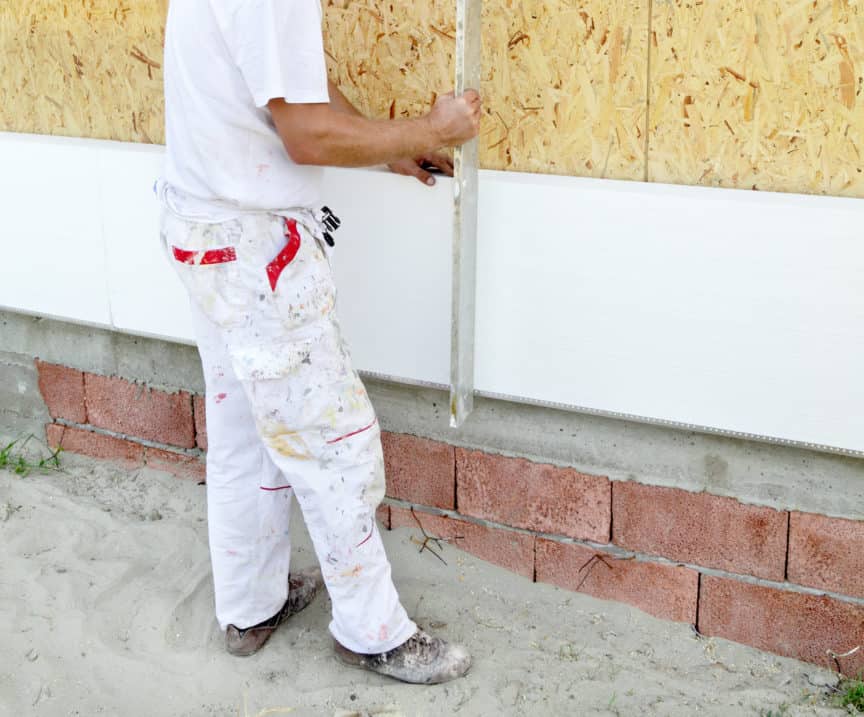
2. Acquire Styrofoam and Painting Materials
Purchasing the right materials is an important part of a successful project. Styrofoam is the name brand for expanded polystyrene (EPS), which comes in a few variations. You can compare different types of polystyrene foams that can work best for your project. Unless you already have the Styrofoam handy, we recommend buying a bit more to practice your design.
After you have the Styrofoam ready, you will need to select your paints and tools. We recommend using the following items to make your Styrofoam look as much like wood as possible:
- Primer or sealer: This will help to make sure that the paint sits evenly on the Styrofoam and does not damage the foam.
- EPS foam coating (optional): If you want to make your Styrofoam more durable, you can add a coating that will help to make sure the material does not damage or dent easily.
- Paint: Acrylic paint is recommended for use on Styrofoam because it is often the most effective for sticking to Styrofoam. If you do choose to go with thicker paints, such as for wood, you should make sure the surface is sealed and primed to protect the foam. Get this in multiple colors: dark for grain, a lighter brown, and your ideal color.
- Brushes: Small and large brushes will depend on your project. You will need a larger brush to apply the foundation color and small brushes to cater to the details of the grain.
- Sandpaper: Used to smooth uneven Styrofoam surfaces for uniformity.
- Wood carving tools (wire brush, soldering iron, or wood grain tool): These are tools that you will use to make the grain and wood detail. Look at
- Wood stains (optional): Adding a wood stain on top of your paint can help you to achieve your desired wood color. Because these stains are specifically for certain woods, they will accentuate the colors you are looking for.
The optional items will be used to further seal your Styrofoam and add more details to your ‘wood.’ We will go over how to effectively use these materials as you paint.
3. Prime and Seal Styrofoam
This and the fourth step can be interchanged and used together as you make changes to the Styrofoam. If you are not planning on carving your Styrofoam to make deeper wood grooves or a physical grain, you do not need to sand or carve the Styrofoam. In either event, you will need to prime and seal the Styrofoam for the best results.
There are multiple products you can use to seal your Styrofoam, and this should be done, so you do not risk damaging or compromising the construction of the material:
- Craft sealants: These are found at craft stores and can be used to protect your Styrofoam. Mod Podge is a typical solution that is used on many craft surfaces. This is a great option if you already have it, or you can find one that is more specific to the Styrofoam application.
- Polystyrene primer: Useful for all polystyrenes, this primer is the most general to protect this material. You will just need to make sure that if you do use this primer that it is not in a spray can.
- EPS foam coating: For the more durability, you may want to look at a foam coating. This is an epoxy that will fill all of the cracks in the Styrofoam and create a seal to harden the piece of Styrofoam completely. You should do this before any carving or sanding.
Regardless of the type of primer or sealant you choose to use, you should not use ones that are found in a spray can form. The aerosols in the can will actually melt the Styrofoam, and this will ruin your project! We recommend painting it on for best results and to properly protect your work material.
You will want to apply a full coat of any primer or seal to your Styrofoam. Make sure you let this dry before starting any further painting or changes to the board for ideal effectiveness.
4. Sand and Carve Styrofoam
If you are using the coating foam, you will want to do this before any carving or sanding so you the piece of Styrofoam can be properly sealed and covered. For other sealants, consider sealing them before and after any physical changes you make to the surface to ensure that all of the areas will be sealed before you apply paint (avoids contact with plain Styrofoam).
This is the step when your carving and sanding tools will come in. Oftentimes, you will see imperfections in the Styrofoam that may make the surface uneven. Consider using sandpaper (lower grit) and applying it gently to the surface until you reach consistency. The goal should be to make it smooth without removing too much or being abrasive because it can be delicate.
If you are planning on using carving tools, you intend to add a bit of texture to achieve your wood finish. For all steps, we recommend practicing on a bit of Styrofoam you won’t be using for the final product so that you do not make changes you can’t fix. This will give you the chance to get your style down and the carvings you may want to make.
Use the following tools with these directives in order to properly execute on the Styrofoam:
- Wire Brush: This is possibly the easiest solution and will create a straight grain (most woods have). You will want to apply even strokes to the foam to create a realistic look. Use the brush in one direction and apply pressure (enough to make a noticeable streak, but not too deep). You can then seal over these areas again and let dry.
- Soldering iron: Using heat, this tool can cut through a wide variety of materials. It gets really hot, so if you do use this method, you will want to be careful. This can be used for more dramatic indentations. Here’s a quick guide on how to use the tool.
- Woodgrain tool: These come in a variety of patterns that mimic the grain of real wood! You can create indentations in the Styrofoam by running it down the material or apply paint to it and make the grain slightly more obvious with additional paint (we recommend this). Use darker paint than your desired end result to make these grains.
The changes you make should be simple, so as not to overwork the Styrofoam. You can achieve the wood look mostly through painting, but adding the physical indentations can make it even more realistic.
5. Paint First Coat of Styrofoam
Once your seal or primer has dried, you will want to get your paint ready. Apply one coat evenly of a lighter wood color than the plan you intend to use for the foundation of the board. This will help to lessen the contrast between the white and dark paint, and also create a more blended and natural tint.
Here are some tips:
- If you are going to make your wood a lighter color, you will want to use a darker color underneath and paint the entire board. This will give the grain texture more energy and life. From that point, you can paint additional coats with the lighter color you want for the final result.
- If you have made indentations in the Styrofoam, consider painting these a slightly darker tint and allowing them to dry so they will show through your wood color. You should apply these gently with a small brush to make sure the strokes remain neatly where they should be.
- This is also the time you will want to paint on knots if you want these on the wood. You can hand paint these on if you feel confident or use wood grain tools that specifically have knots in them. If you do draw it on yourself, practice with a pencil or use a stencil beforehand, so you get the exact look you want for the finished product.
- Your coats of paint should be evenly applied to the best of your ability. It is okay if this is not perfect because wood is often not uniform in its coloring. The goal is to avoid making obvious changes in a coating that make it appear as though it has been painted or that brush marks appear.
6. Allow Paint to Dry
After each round of paint, you will want to make sure it dries completely. This will not only result in a better appearance, but you will allow the paint to seal and hold better to the Styrofoam. It will also give you a better idea of the final color you will be left with and areas that may need touching up.
Wet paint is a poor indicator of the finished color you will be left with. Checking after each time it dries will lead to the best and most desirable results.
Here are some tips for applying paint to allow for faster drying:
- Thin coats: If you work with thinner coats, you can easily control the color, and it will dry much faster. You can add more coats in a shorter period of time, and the quality is typically better.
- Ventilation: Keep a fan on or nearby if you want it to dry faster. The consistent airflow will speed up this process!
- Divide into sections: Focus on one section at a time and then work on the next. This will allow that section to dry as you work on the next. This is helpful if you are working with multiple pieces of Styrofoam.
- Avoid humidity: Try to do any painting in non-humid areas as the moisture in the air will slow the process. To combat this, keep the air-ventilated with doors open or ensure that there is airflow and movement around the work.
Providing the best environment for drying will not only make sure you are painting with the most efficiency, but you are also ensuring the best quality with solid coats.
7. Add Additional Coats
Results that look the best are often completed with multiple shades of paint. Now that you have painted your grains dark and covered with a lighter natural color, you can add more coats to make the Styrofoam more realistic. You will want to take your desired paint color and paint it on lightly, especially if it is darker.
Allow each additional coat to dry completely before you add more. Keep all the brush strokes in the same direction as the grain, so you do not create unwanted or unnatural looking textures.
You can also consider using wood stains for your top coats to give the Styrofoam a more natural wood look. This will not only help you to achieve your desired wood color, but it gives it a finished look depending on the type you use. You can give it a glossier or matte finish, and this will also serve as a sealant on top.
Adding stains will keep your paint from chipping or fading away over time. You can also go over the work with another coat of stain as time passes if the Styrofoam is kept in an area that is exposed to light. As these colors fade, the stain can be added to darker or return it to its most desirable coloring and finish.
8. Dry Brush Details
For your final touches, you will want to consider using a dry brush technique. This will help to get the natural inconsistencies that you would find in wood. To achieve this, you will want to use a medium-sized brush and only put the tip of the brush into the paint. You can check out this video to get an idea of how the technique works.
You can do this with your dark color or the base color you initially used. The goal is to maintain the dark paint that has been left in the indentations and cracks you painted the darkest color. The dry brushing will give you extra texture on the higher parts and not take away from the dark contrast you have created.
You will need to do this process carefully by ensuring that there is not too much paint on your brush. Check the brush, so you don’t have any bristles clumped together. Tap the brush on the side of the paint can or blot it with a paper towel to keep it as light as you can. Repeat this process until you have covered the piece of Styrofoam.
Let it dry completely so you can accurately see the results before adding additional layers of paint.
9. Add Additional Wood Grain Details
This step is more of a touchup section than anything else. Once you have let it dry, you are going to want to evaluate your work. If you notice that the grains you have created do not stand out enough, consider lightly going over them with darker paint again. You will then need to go over these areas lightly with your wood paint.
Take this time to make any last-minute additions to paint and adjust for coloring that may not be to your satisfaction. Keep in mind that too much paint or stain can take it too far, leaving you with a situation that is difficult to fix!
Because you will likely want to use your brushes over again for the various steps, it is important that you also thoroughly clean them. This will help to keep the brushes in good condition so you can use them for projects moving forward in the future. There are some primary steps you should keep in mind for proper brush cleaning:
- Buy good brushes: The best way to ensure that all of the paint will come out easily and without damaging the brush is to purchase higher quality.
- Clean with water: Run water through the brush to remove acrylic and other water-based paints. Do this until the water runs clear, gently massaging the bristles if you need to remove paint.
- Dry thoroughly: Drying is also an important component of cleaning your brushes. Blotting them with paper towel or newspaper will get additional paint off the brush and allow you to use them again more quickly.
Not only should you be paying attention to the small details related to your project but taking care of your materials is also important. This will allow for better quality work on future projects.
Additional Considerations for Painting With Styrofoam
Painting with Styrofoam can be really simple because it is lightweight and easy to work with, but you should know that there are some additional things to keep in mind. Some of the properties of Styrofoam will force you to make decisions that you may not with other materials. These are some things to keep in mind:
- Avoid spray paints: The paint itself is not the problem, but the aerosol chemicals in the paint can actually melt Styrofoam. If you do use spray paint, keep it far away from the surface and use it as a mist of color, if anything. Acrylic and water-based paints are preferred because they won’t damage the surface and dry quickly.
- Uneven surfaces: Because the surface can be uneven, be aware that paint may pool in the cracks. To avoid this, lightly sanding the surface can help to make it even for a consistent paint. Stenciling brushes can help cover the hard to reach cracks as well!
- No hands: How you hold the piece of Styrofoam will depend on its size. For smaller items, we recommend using a piece of wire or a skewer-like wooden stick, so you don’t get paint all over yourself. If you are working with a much larger piece, you can work in sections and place your hands on the painted portion once it dries.
Here is a simple demonstration of Styrofoam painting, so you have an idea about the technique. These pieces have not been altered or cut into like you may do for your wood project.
When Would You Want to Paint Styrofoam to Look Like Wood?
If you want to try out this technique but are not sure what kind of project to take on, we have pulled together some projects that typically use this painting and carving style:
- Beams: If you are trying to put up beams, but don’t want to pay for the wood, painting Styrofoam can give you a lightweight and inexpensive alternative.
- Decorative signage: You can make signs on ‘planks of wood’ that will give you the appearance of lumber and a
- Set backdrops: Larger wood fences for a drama set or decorations can be made with Styrofoam painted in this style.
- Crafts: Any craft you want to take on can be painted in a wood style. Small décor items or boxes made of Styrofoam can be easily upgraded.
Regardless of the type of project you choose to work on, we recommend practicing the technique on small pieces of Styrofoam before tackling the big project. This will allow you to master the technique and make mistakes (which are great learning opportunities) before taking on the final project!
Share this Post
Giovanni Valle is a licensed architect and LEED-accredited professional and is certified by the National Council of Architectural Registration Boards (NCARB). He is the author and managing editor of various digital publications, including BuilderSpace, Your Own Architect, and Interiors Place.