
Affiliate Disclaimer: Some of the links below are affiliate links. As an Amazon Associate, I earn from qualifying purchases.
Homeowners often dream of a full bathroom makeover, but sometimes it’s just not in their current budget. There are some budget-friendly ways to refresh and renew your bathroom without a total redo. Just changing the shower curtain, updating the faucet hardware and towel rods, or repainting your bathroom cabinets can make you much happier with your bathroom.
To paint your bathroom cabinets, first make sure you have the right tools and supplies, remove cabinet parts, and prep your painting space. Then, start by deglossing the backsides of the cabinet doors before priming and finally, painting. Make sure to paint them on a flat surface.
DIY home improvement projects can be daunting, but you’ll do fine if you follow this DIY guide. We’ll go over everything you need to get started, including how to prep your space and your cabinets and which type of paints are recommended for bathrooms. Let’s jump right in!
How To Know When Your Bathroom Cabinets Need Repainting
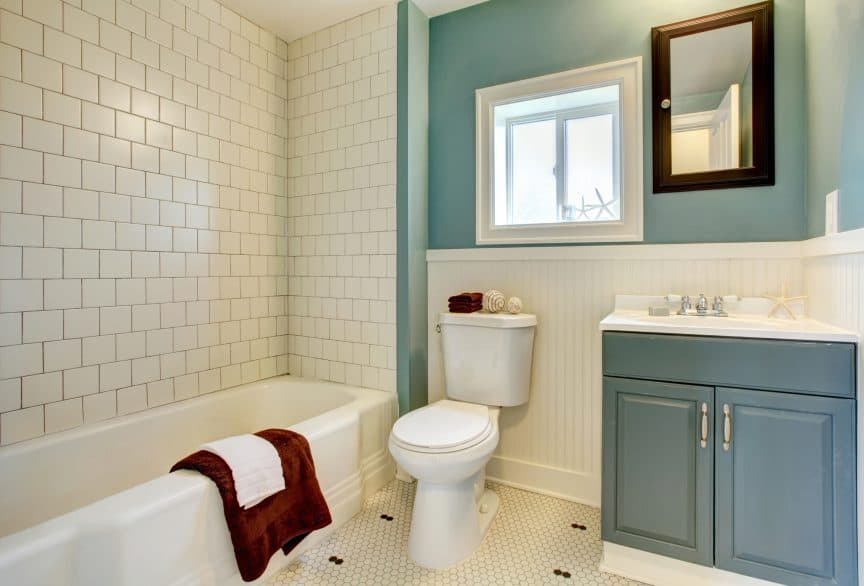
Before spending money on paint and supplies, examine your current bathroom vanity to determine if it’s worth painting. The countertop should be in good condition or better because that portion will remain untouched. You should also at least like the look of the countertop and sink because you’ll likely be living with it for several more years after repainting the cabinets.
You will also need to determine whether your vanity is structurally sound. If your vanity leaks water into the cabinet below, there could be irreparable water damage. Unhealthy mold could form in this situation, making your vanity not worth painting.
You may want to replace your vanity if you’re remodeling another part of the bathroom, such as the shower, tub, or floor. It would be best to have your vanity match these other parts of the room. If you have space and money, you should replace your vanity if the amount of storage it provides is not sufficient. Finally, if you are putting your home on the market, replacing your bathroom vanity may increase your home’s perceived value.
Different Types of Bathroom Cabinets
The most common materials you are likely to find in bathroom cabinets are particleboard, MDF (medium-density fiberboard), plywood, and solid wood. Each of these building materials has its pros and cons, especially when it comes to painting it.
- Particleboard is usually sturdy to begin with and inexpensive to use for building cabinets. Bathroom cabinet manufacturers can cover particleboard with laminate, wood veneers, or melamine. Two of the most significant drawbacks of particleboard cabinets are they tend to warp or sag under the strain of heavy items, and they are not water or moisture-friendly. You can paint particleboard if you prime it first.
- MDF is denser and more substantial than particleboard. When exposed to moisture, this material can swell up. Although you can’t stain MDF as you can wood, you can paint it easily. Since MDF is a high-density composite of glue and real wood particles, it is incredibly challenging to penetrate with nails or screws.
- Plywood comes in sheets, which are multiple layers of wood veneers glued together. Plywood comes in different quality levels. High-quality plywood is strong and resembles real wood, while lower-quality plywood is softer and has a plastic woodgrain coating.
- Solid wood and solid hardwood both are 100% natural wood. Hardwood comes from oak, maple, or cherry trees, while regular solid wood is likely something softer, such as wood from pine trees. Because most wood expands and contracts based on the air’s humidity, it could cause the paint to split and crack. Staining is a much better option for wood than paint.
How well you have prepared will be reflected in how smoothly your DIY home improvement project will go. Having the tools and supplies will get you off to a good start with painting your bathroom cabinets. Note that some things are optional, and you will only need to buy them if you are performing specific tasks.
Make Sure You Have the Right Tools and Supplies
Must-Haves
- Bucket and a large sponge
- Industrial cleaner
- Rubber gloves
- Screwdriver (manual or electric)
- Deglosser
- Primer
- Paint
- Wooden paint stirrers
- Paint tray
- Paint roller
- Paintbrush
- Drop Cloths
- Painter’s tape
Optional
- Wood putty and putty knife (For repairs or changing to new hardware)
- Sandpaper (For repairs or changing to new hardware)
- Tack cloth (For repairs or changing to new hardware)
- Marker or chalk (For changing to new hardware)
- New hardware (Handles, knobs, and hinges)
- Paint sprayer (If preferred over paint roller or brush)
Prep Your Space
Prepping your space means preparing your bathroom and your workspace. The two may not be the same space if you have a small bathroom. You may need to paint the doors elsewhere, like in your living room, garage, or backyard.
Prep your bathroom by removing all items on your bathroom vanity and inside your bathroom cabinet. You can store them safely by temporarily putting them in a laundry basket or two. You should also remove any freestanding items around the vanity, such as plants, trash cans, toilet brushes, baskets, and magazine racks.
Prepare your workspace by moving everything aside that you do not want accidentally splattered with paint. If you’re painting in your living room, move the furniture aside, and roll up your area rug. If you’re painting in your garage, then you may want to cover your car with a tarp.
Remove Knobs, Handles, and Drawer Pulls
Whether you plan on reusing the same handles, knobs, or drawer pulls on your soon-to-be-repainted cabinets doors and drawer, you will need to remove them before starting to paint. While you have them off, you could polish or spray paint the hardware to give them new life. If you are changing any of the hardware elsewhere in your bathroom, replacing your knobs, handles, and drawer pulls with something that matches may make sense.
Remove Cabinet Doors and Hinges
Some like to take a chance by painting their cabinets with the doors on, but it’s best to remove the cabinet doors and lay them flat to paint both sides. This method gives you a smoother paint job. Although some cabinet hinges are hidden from plain sight when the cabinets are closed, you will still need to remove them from both the cabinet and the doors. Doing so will allow you to get sufficient coverage on those spots and prevents you from getting paint on the hinges.
Protect Your Walls and Floors With Painter’s Tape
Although it may take a little extra time, it is worth the time and effort to mask off portions of your bathroom to prevent paint from getting on them. It would be best if you taped off every edge that meets your bathroom cabinet. These edges include the line where the vanity top meets the cabinet underneath it and meets the floor and the wall.
Cover Your Floor
Even if you are the tidiest painter ever, it still would be wise for you to cover the entire floor with drop cloths. Accidents do happen. You could easily step on a drop of paint and track it all around your room and beyond. Do the same thing with your workspace, even if it’s in the garage or your backyard. It only takes moments to put drop cloths down, but the paint drips and splatters on grass or concrete last much longer than that.
How To Prep Your Bathroom Cabinets Without Sanding
Sanding indoors is a messy business. If you can take your vanity outside to your backyard or your garage or workshop, that would be better, but not everyone has space and muscle to do that. In this section, we’ll take a look at a smart and effective workaround option.
Watching this DIY home improvement project completed from start to finish may give you the confidence you need to tackle it yourself. This homeowner shows you how she paints her bathroom cabinet in her living room. Watch this video to see what tips and tricks she has to share:
Clean Your Bathroom Cabinet
Before you go further, you’ll need to deep clean your bathroom cabinet inside and out. Even if you don’t plan on painting the interior, it’s still a good idea to make sure all surfaces are dirt, grime, and grease-free. The go-to industrial-strength cleaner is Trisodium phosphate. As cleaning agents go, this chemical can be harsh and irritating to your skin. You should most definitely wear gloves to protect your hands when cleaning with chemicals like this.
If you’re seeking a safer alternative to Trisodium phosphate, you may want to consider this extremely highly-rated industrial-strength cleaner called Simple Green Industrial Cleaner and Degreaser. This non-toxic Simple Green product is both a cleaner and a degreaser with a very mild pH and does not contain any petroleum products.
Depending on what material your bathroom cabinet is, you may want to use minimal liquids when cleaning it. Remember that particleboards are especially susceptible to water damage. If you used chemicals to deep clean your bathroom cabinet and would like to go over the surface with clean water, then be sure to go over the entire thing with a clean, dry shammy to remove as much water as possible. This rule is valid for particleboard, MDF, plywood, or solid wood.
Use a Deglosser in Place of Sandpaper
After you have thoroughly cleaned and degreased your bathroom cabinet, you can use a deglosser or liquid sandpaper to remove the varnish on top if you are working with stained or painted wood. A deglosser is an extremely convenient alternative to regular sandpaper. It gets the job done without all the messy wood dust that sandpaper leaves behind.
A deglosser also makes shorter work of your sanding project. Sanding with sandpaper takes a lot of elbow grease and hours of hard labor. With liquid sandpaper, you apply it to all previously varnished surfaces. After letting the deglosser do its job for about 15 minutes, wipe off any residue from the deglosser and varnish with a clean rag. You should be able to see the residue on your rag. Watch this video to see just how quick and easy using a deglosser can be:
The Klean-Strip Quart Easy Liquid Sander Deglosser is well-rated and comes in various multi-pack quart sizes to match the size of your home improvement project. The product instructions suggest you wear safety goggles when working with this chemical. They also recommend that you apply the deglosser in a circular motion, making sure to switch to a clean part of the cloth each time you add more of the liquid sander.
Prime All Surfaces To Be Painted
Priming is a must for most surfaces you are planning on painting. Based on your bathroom cabinet’s type of material, follow the guidelines below about how to prime the painting surfaces and which kind of primer you should use for the job.
Before you begin priming your bathroom cabinet, inspect it again for any dents or chips. If there are any minor ones, you should consider filling them in with wood filler or putty. Then sand the area down until it’s smooth. Skip this if you are going for a distressed look for the finished product. If there is significant damage, it may make sense to replace your bathroom vanity before getting too deep into this project.
Priming Cabinets Made of Particleboard
Since particleboard cabinets usually have a laminate layer on the outer surfaces to protect the unit from moisture, you will need to use a deglosser on it before applying primer. The laminate is too smooth to allow primer or paint to stick to it. Remember to keep the moisture to a minimum when using the liquid sandpaper due to the particleboard’s inherent nature.
Even though you’ve prepped the laminate on your particleboard cabinet, you should look for a high-adhesion primer. If you are using the water-based latex acrylic paint recommended earlier, then be sure that the primer you buy is compatible with that type of color layer. Some primers work with both water-based and oil-based colors.
The bright white Rust-Oleum Zinsser Bulls Eye 1-2-3 Plus Spray Primer is made especially for difficult surfaces. Spraying on a nice even coat of this primer would eliminate brushstrokes on your laminate-covered particleboard cabinets. This primer dries quickly and offer good coverage with just one coat.
The white spray-on primer is ideal for use under light colors of paint. If you chose a deep or dark color to paint your bathroom cabinet, then the gray aerosol Rust-Oleum Zinsser All-Purpose Primer would work better for you. Using a white primer would require additional paint layers to get the proper coverage.
Priming MDF Cabinets
As previously mentioned, MDF takes paint very well. If the bathroom cabinet you plan to paint is new, it’s surfaces are ready to paint, except for the raw edges. It would be best if you sealed the edges where the manufacturer cut the MDF. If you don’t protect those parts, they will be coarse and fuzzy. They will also be susceptible to water damage.
To seal the edges of your new MDF cabinet, apply a generous coat of drywall compound with your finger. After the drywall dries completely, sand it down until it creates a smooth, seamless edge. When the cabinet is clean, dry, and free of wood dust and particles, you are ready to start painting. Even though you may not need to prime MDF, you still may want to because it will allow for better coverage for your paint.
If you are giving your bathroom cabinet a makeover, then the chances are that the manufacturer or a contractor has already coated your unit. If this is true, you will want to use a deglosser to prep the laminate or veneer surfaces like you would with a particleboard cabinet. Then use a primer before beginning to paint.
Priming Cabinets Constructed From Plywood
Plywood soaks up large quantities of paint. Applying primer on all surfaces will save you from needing to use three or four coats of paint. Whether you’re renewing an existing plywood cabinet or starting fresh with a new one, experts recommend priming for all qualities of plywood. For lower quality plywood that has a woodgrain coating, you may need to use a deglosser.
It would be ideal if you purchased a mildew-resistant primer that doubles as a sealer for plywood and real wood cabinets. The highly-rated KILZ Kitchen & Bath Interior Latex Primer/Sealer/Stainblocker has a mildew-resistant finish. KILZ designed this primer to hold up against environments with high temperatures, high humidity levels, and high moisture.
Priming Solid Wood or Hardwood Cabinets
When you have cleaned, degreased, and had any varnish removed from your wooden bathroom cabinets, you should prime the surfaces as you would with plywood cabinets. Since most natural wood has some grain, you should follow the grain when applying the primer. Because wood expands and contracts as the humidity level changes, the paint may crack. Using a mildew-resistant primer prevents mildew from forming under the paint layer.
Check To See if the New Hardware Is a Different Size
If you are changing your cabinet doors and drawers’ hardware, check to see if the existing screw holes align with your new hardware. If not, you will need to use a wood filler to cover the holes on the drawer fronts and doors, on both the front and back. Then sand them down when the wood filler has dried, removing any debris. Do this before you prime your cabinet.
Number the Doors and Drawers
If you have multiple doors and drawers that are identical, then it would be smart to number them with chalk on the backsides. That way, you can keep them laid out in an organized manner in your workspace. Pick up one piece to work on and put it back in the same spot. You might also want to put the corresponding hardware next to each door or drawer front.
Degloss, Prime, and Paint the Backsides of Cabinet Doors
When working with a new product and cabinet type, it is smart to start on the doors and drawers’ backsides first. They make perfect testing areas. Once you become accustomed to how the surfaces receive the deglosser, primer, and paint color, you will be ready to tackle the front sides masterfully.
Prime and Paint Doors on a Flat Surface
When priming and painting the back and front sides of your doors and drawer fronts, it’s best to do so on a flat surface. This recommendation applies whether you are using a brush, a roller, or both. Doing so ensures that your primer and paint will dry in a smooth coat. The reason this works so well is that most primers and paints are self-leveling, making any brushstrokes in the wet layer disappear into it.
Use a Cabinet Makeover Kit
If you are a novice and don’t feel like you need specialized products to suit your DIY cabinet makeover, then you may want to consider using a cabinet makeover kit. This Nuvo Hearthstone All-in-One Cabinet Makeover Kit comes in a warm, greige color, a shade of grey and beige blended. Let’s take a better look at this very highly-rated cabinet makeover kit.
This kit comes with a water-based acrylic 2-in-1 primer and paint product with a satin finish. Since Nuvo designed this kit for kitchen cabinets, it’s 100 sq ft (9.3 sq m) coverage is more than enough for the average household’s bathroom. You can use this kit on both wood or laminate surfaces. Although the kit states you don’t need to remove the cabinet doors, it’s recommended that you do so.
Is Waterproof Paint Right for Your Bathroom Cabinets?
There is waterproof paint made to help seal your basement, but are these the right paint for your bathroom? Some experts recommend semi-gloss paint because they make surfaces easier to wipe down. In recent years, a few well-known paint manufacturers have begun to introduce paint formulas they designed especially for kitchens and bathrooms.
When shopping for the right paint for your bathroom cabinet, look for mold and mildew-proof on the label. Being water-resistant or waterproof is all well and good, but being resistant to mold and mildew development is critical. Some paint brands have even developed mold and mildew-proof paint in a satin finish. This development is a massive breakthrough for homeowners who aren’t fans of glossy paint in the bathroom.
The Zinsser Perma-White Mold & Mildew-Proof Satin Interior Paint is a good value and well-rated. Satin paint works much better than glossy for a bathroom cabinet, especially if you have a rustic or contemporary home. Glossy paint also makes any surface flaws easily detectable. If you have a modern bathroom, then the Zinsser Semi-Gloss Rust-Oleum Perma-White Mold & Mildew Proof Interior Paint might work better for your sleek bathroom.
Other Things You Might Want To Paint in Your Bathroom
Since you have the supplies already, take a look around your bathroom to see what else you could give a fresh coat of paint. It would pull your bathroom together if other parts of the room shared the same paint color as your bathroom cabinet. Below are some suggestions about where you could start.
Bathroom Door and Windows
Your bathroom door, doorframe, or both should be on your list of things to paint. Although you may not think so, the door is one of the main fixtures in your bathroom. This point also applies to your bathroom closet doors. Do the same with your bathroom windows and window frames. If you have interior shutters on your windows, you should consider painting those too.
Bathroom Shelves or Wall Cabinets
If you have open wall shelves or hanging cabinets, consider painting those to match your bathroom cabinet. Those would be small and very manageable projects, but the impact might be significant. A cohesive look would make your bathroom feel more harmonious rather than dissonant.
Molding Around Your Bathroom
If you have molding around your bathroom where the wall meets the ceiling, you should consider painting them. The same goes for any molding around your baseboards. If you have wainscoting in your bathroom, it should be at the top of your list for painting because it is one of your bathroom walls’ most prominent details.
Small Details
Some tiny details you have around that bathroom that you often overlook as candidates for painting are things like your outlet covers, wooden trays, wooden towel bars, and robe hooks. If you look around, you might spot more things to renew and refresh around your bathroom. Once you get started, you might not be able to stop.
Final Thoughts
Painting your bathroom cabinet is not as big of a project as you may have expected it to be. Follow our guide, and the main steps of cleaning, deglossing, priming, and painting are easy once you get started. Please note the tips provided in this article for priming and painting particleboard, MDF, plywood, and real wood cabinets. If you recruit a friend to help, it will make the project more enjoyable and shorter work overall.
Sources
- Modern Bathroom: Signs You Know It’s Time To Replace Your Bathroom Vanity
- Builders Surplus: Bathroom Vanity Materials – Pros and Cons
- Wikipedia: Medium-density Fiberboard
- Bob Vila: How To: Paint Bathroom Cabinets
- Wikipedia: Trisodium Phosphate
- Archetypes: Effortlessly Paint Over Any Stained or Painted Wood Without Sanding
- Family Handyman: Choosing the Best Primer and Paint for Laminate Cabinets
- Bob Vila: How To: Paint MDF
- ThePlywood.com: Painting Plywood
- Hunker: How to Paint Wood Cabinets
- Love Remodeled: Best Greige Paint Colors
Share this Post
Giovanni Valle is a licensed architect and LEED-accredited professional and is certified by the National Council of Architectural Registration Boards (NCARB). He is the author and managing editor of various digital publications, including BuilderSpace, Your Own Architect, and Interiors Place.