
Affiliate Disclaimer: Some of the links below are affiliate links. As an Amazon Associate, I earn from qualifying purchases.
Painting a room can help customize its design and add character to any area. However, it may be difficult to paint walls in two distinct colors since you’ll want a clear and crisp line without the two colors blotching together.
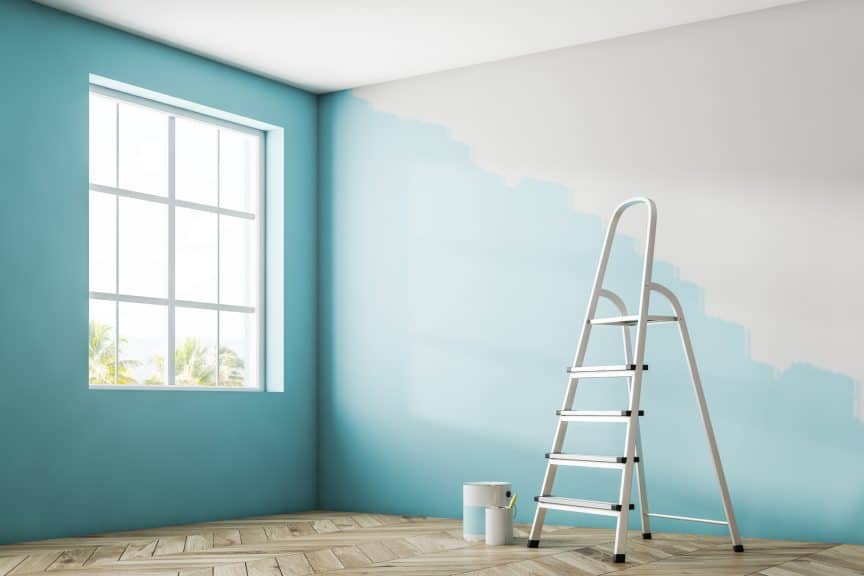
Here’s how to paint a corner where two colors meet in 6 easy steps:
- Paint one wall.
- Wait for the wall to dry.
- Apply painter’s tape to the corner wall.
- Repaint the corner wall.
- Paint the other side of the wall.
- Take off painter’s tape.
Testing your DIY painting skills with two-colored walls? Continue reading, as I’ll teach you how to do this correctly. This article will also cover the following:
- What an accent wall is
- The types of tools you’ll need
- The process of applying paint and tape
- The method of removing painter’s tape
- Some quick tips and tricks
What Is an ‘Accent’ Wall?
An accent wall is a wall where one design or color differs from the other walls in the room. It’s meant to give off a different aesthetic and can be used to create a bold and modern look. Generally, the two colors are dramatically different, but they can be any color you desire.
Painting one wall may seem easy, but painting two different colored walls can be a bit more tricky.
To paint an accent wall, you’ll need to gather the appropriate tools, and here’s a list of what you’ll need to do this design project successfully:
- Painter’s tape
- MaxMan 2 Pieces Angled Sash Paint Brush Set – here is a brush set from Amazon that helps create a crispy and clean edge while painting.
- Two colors of paint
- Primer
- Towels
- Paint bucket
- Extra brushes
Once you have everything, here’s how to paint a corner where two colors meet:
1. Paint One Side of the Wall
Assuming you have already applied a base coat, apply paint as you normally would to one side of the wall. While doing this, it’s not essential to create a clean or crisp line on the edge of the wall yet. You can still be messy if necessary because you don’t want to miss a spot.
2. Wait for the Wall To Dry
Understanding what type of paint you’re using can help you estimate when it’s going to dry. After all, you’ll have to wait until the paint is fully dry before moving on to the next step.
Here’s an estimate of how certain fast paints dry:
- Latex paint. Latex-based paints are water-based and are much thinner than oil-based paints. It doesn’t have a glossy finish and may appear more matte. Due to this, it only takes one to four hours for latex paint to fully dry.
- Oil-based paints. Oil-based paints are typically thicker, more durable, and are water-resistant. The paint will also have a glossy finish that can take up to six to eight hours to dry thoroughly. However, one should wait at least 24 hours to apply another coat on top.
Other Factors That May Influence Paint Drying Speed
If you’ve waited the allotted time but find that the paint is still wet, other factors could be at play, causing it to dry slowly.
- Temperature. As the temperature drops, the paint becomes thicker, making it longer to dry.
- Humidity. When humidity is high, the paint will be exposed to water vapor, which can end up causing it to dry slower and ruin the paint finish.
3. Apply Painter’s Tape to the Corner Wall
Once the paint is dry, you need to apply painter’s tape to the wall corner you just painted. Ensure you align the edge of the tape to be perfectly perpendicular to the corner. The straighter the tape, the crisper the line will be.
You should also work in small strips so that the tape is easier to apply. If necessary, you may also need to use multiple layers of tape to ensure that it covers enough space to prevent paint from getting on the wall.
4. Repaint the Corner Wall
It may seem tedious, but you need to reapply paint over the tape for it to be the first color to show up if it bleeds through. This helps ‘seal’ the paint, and if any bleeds through, it’ll be the same as the base color.
Once you’ve repainted the corner, allow the paint to dry before starting on the next step.
5. Paint the Other Side of the Wall
Now that the paint is dry, carefully paint over the other side with the second color and ensure not to get any paint onto the other wall. It helps to use the two-inch (5.08-cm) angled paintbrush when applying the paint near the corner. Using the brush is ideal because it will create a clean line without the risk of smudging the paint over the edge of the tape.
6. Take Off Painter’s Tape
Unlike the first time, peel off the tape before it’s done drying. This is because you don’t want to end up pulling off the top coat of paint and ruining the crisp edge. To prevent any smudging, you need to rip off the tape slowly.
Applying paint can be tricky, especially if you’ve never created clear edges. Here’s a demonstration by FrogTape on how to paint an accent wall:
Tips for Applying Painter’s Tape
When applying painter’s tape, you must do it correctly the first time. If you don’t, you could end up with blotchy lines of paint that don’t resemble a straight line at all.
Here are some tips you may find helpful for applying painter’s tape:
- Always allow the paint to dry before placing the tape. Placing the tape on top of wet paint can cause it to smear and become uneven.
- Apply in 2-3 ft (60.96 to 91.44 cm) strips. Apply the painter’s tape in two to three feet (60.96 to 91.44 cm) sections to reduce the number of creases and wrinkles.
- Apply tape from the strip. Instead of taking strips and cutting them before applying, do it straight from the tape roll to avoid accidentally placing it crooked.
- Use a level. Using a level can help you get a perfect line. Place it at the edge of the wall and use a pencil to help draw a straight line, which will act as a guide for placing the tape.
Tips for Removing Painter’s Tape
Another struggle we commonly see with homeowners is that they remove the tape too late or too soon. There’s an ideal time to remove the tape and technique on how you should rip it off.
Here are a few tips you may find helpful when you’re removing the painter’s tape:
- Remove quickly. The painter’s tape should be removed after thirty minutes but before six hours. You want to wait long enough so that the paint doesn’t smear. However, you don’t want to wait too long, or else the paint may rip off part of the topcoat.
- Remove old tape. If you’re going to be doing sections multiple times, remember to remove old tape permanently because paint tends to bleed through the tape. If you don’t remove it, the colors could end up mixing.
- Use a razor if necessary. Use a razor to score the edge of the tape before removing the tape. What this does is help loosen the surrounding paint and make it rip off easier without taking any of the paint with it.
FAQ
- Can I use any tape? You can use any tape, but painter’s tape is specifically designed to rip off easily. The tape can be applied to multiple types of surfaces and will still come off, including glass, metal, wood, and vinyl. Aside from that, it also remains easy to remove even if exposed to direct UV lights.
- Can you easily paint two corners on all types of walls? The texture of the wall can highly impact the outcome of the finished result. To ensure you’re getting a crisp edge, you may need to apply caulk or use specific brushes to get a clean edge.
- Do I need to prepare my walls before painting? Before applying any paint, clean your walls thoroughly. From there, you’ll also want to prime any marks. Doing this will help the result look better and allow the paint to apply smoothly.
- What is the best tape to use? FrogTape Multi-Surface Painter’s Tape is the most popular tape brand. The brand provides multiple types of tape, which are designed for various painting situations. The benefits of using FrogTape are that they prevent bleeding, rip off easily, and are easy to apply.
Conclusion
It can be a hassle to have to redo a wall you’ve already painted. However, adding an accent wall can help create a more modern and homey atmosphere.
While you could quickly call a professional painter, it may be more cost-efficient to do it yourself if you’re doing one accent wall. If you learn the correct technique, you’ll easily paint the corners without any smudging.
We hope this article helped and happy painting!
Sources
- MyMove: How Long Does it Take Paint to Dry?
- SFGate: Painting Tips for Edges & Corners Where Walls of Different Colors Meet
- FrogTape
- Love Remodeled: Painting an Accent Wall: How to Paint the Corner
- YouTube: How to Paint an Accent Wall
- GSL Painting LLC: How Temperature and Humidity Affect Paint and Painting Application
- Amazon: MAXMAN 2-Pieces Angled Sash Paint Brush Set
- Amazon: FrogTape Multi-surface Tape with PaintBlock
Share this Post
Giovanni Valle is a licensed architect and LEED-accredited professional and is certified by the National Council of Architectural Registration Boards (NCARB). He is the author and managing editor of various digital publications, including BuilderSpace, Your Own Architect, and Interiors Place.